


Description
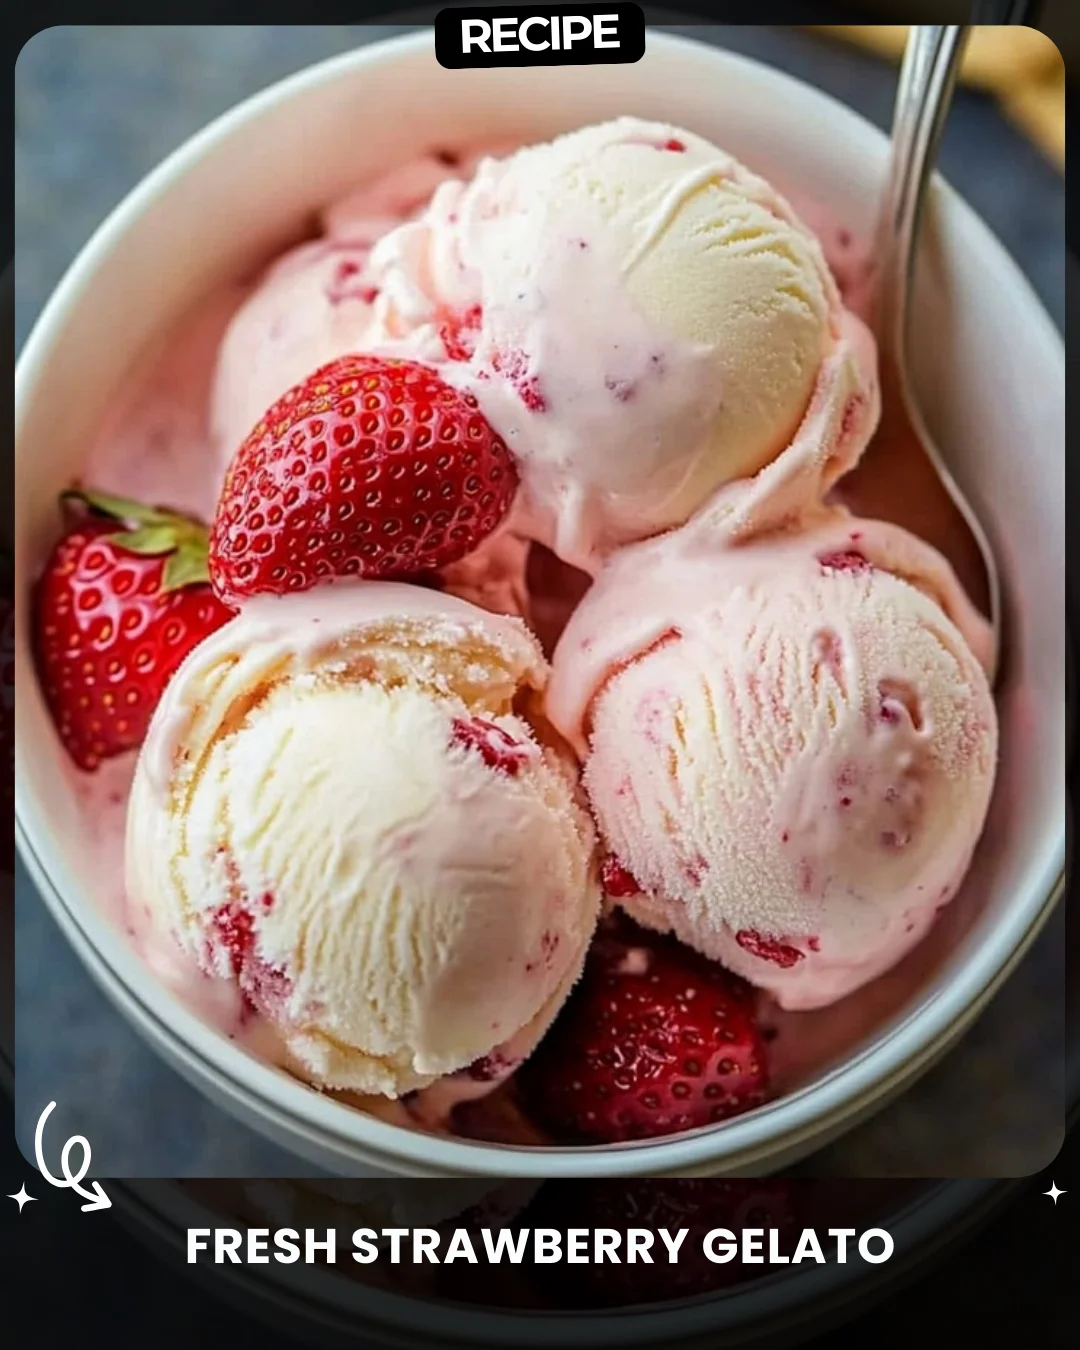
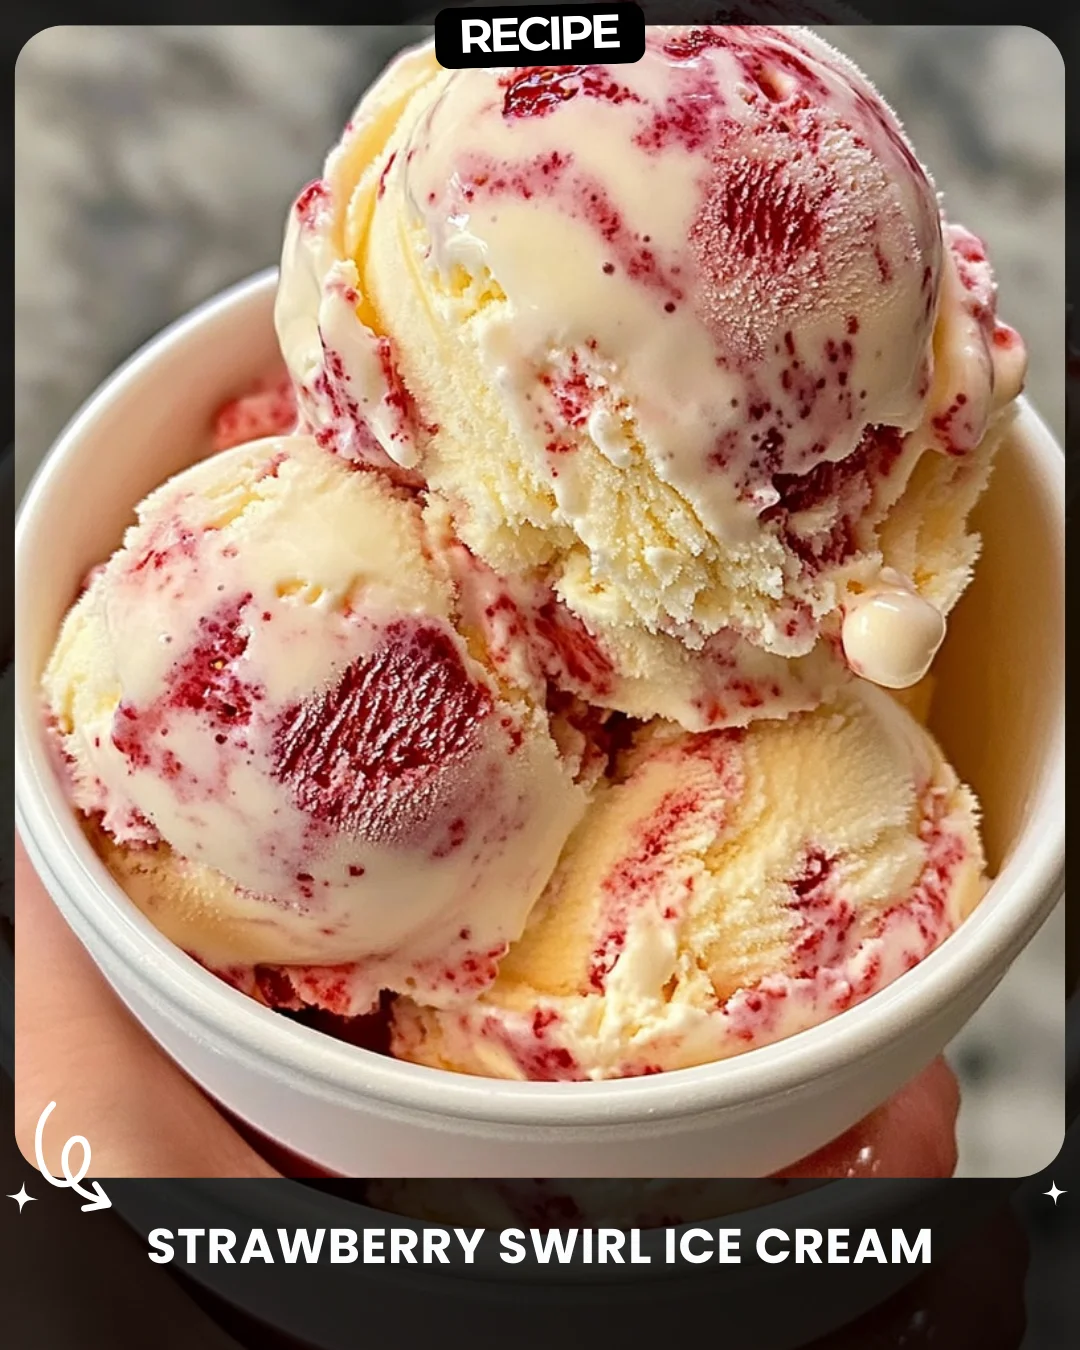
Strawberry Swirl Ice Cream
Creamy, sweet, and packed with strawberry flavor, this ice cream is a treat for all ages. Try making it at home today!
Ingredients:
2 cups heavy cream
1 cup milk
¾ cup sugar
1 tsp vanilla extract
1 cup fresh strawberries (blended)
2 tbsp honey
Steps:
Puree strawberries with honey and set aside in the fridge.
In a bowl, whisk heavy cream, milk, sugar, and vanilla.
Pour into an ice cream maker and churn until thick.
Swirl in the strawberry puree, then freeze.
Serve scoops of pure happiness!
Save this recipe for your next ice cream night!
#FrozenDelights
Step-by-Step Guide
Follow these detailed instructions for perfect homemade strawberry swirl ice cream. First, thoroughly wash and hull your fresh strawberries. Blend them with the 2 tablespoons of honey until completely smooth. Pour this puree into a sealed container and refrigerate for at least one hour; this chills the mixture and intensifies the flavor. While it chills, take a large mixing bowl and combine the 2 cups of heavy cream, 1 cup of milk, ¾ cup of sugar, and 1 teaspoon of vanilla extract. Whisk vigorously for 3-4 minutes until the sugar is fully dissolved and the mixture is slightly frothy. Pour this base into your pre-frozen ice cream maker bowl and churn according to the manufacturer’s instructions, typically 20-25 minutes, until it reaches a soft-serve consistency.
Serving Suggestions
Elevate your ice cream presentation with creative serving ideas. For a classic treat, serve in a waffle cone with a fresh strawberry on top. For a decadent dessert, place a scoop over a warm, homemade shortcake or a warm brownie. A drizzle of dark chocolate sauce or a sprinkle of chopped nuts adds wonderful texture. For a refreshing twist, serve alongside a glass of sparkling lemonade or prosecco for a sophisticated adult dessert.
How-to Summary
In brief: Chill a strawberry-honey puree. Whisk a creamy base of cream, milk, sugar, and vanilla. Churn the base in an ice cream maker until thick. Gently fold or swirl the chilled puree into the churned ice cream. Transfer to a lidded container and freeze until firm, about 4-6 hours, before serving.
Frequently Asked Questions
Can I make this without an ice cream maker?
Yes. Pour the whisked base into a deep, freezer-safe container. Freeze for 2 hours, then remove and whisk vigorously to break up ice crystals. Repeat every 30 minutes for 2-3 more cycles before swirling in the puree and freezing solid.
Can I use frozen strawberries?
Absolutely. Thaw frozen strawberries completely and drain any excess liquid before blending to prevent a watery puree that can form icy chunks.
How long does it keep in the freezer?
For best texture and flavor, consume within 1-2 weeks. Store in an airtight container with parchment paper pressed directly on the surface to prevent freezer burn.
Why is my ice cream too hard?
This often results from over-freezing or not churning enough air into the base. Ensure your ice cream maker bowl is fully frozen and allow the ice cream to temper at room temperature for 5-10 minutes before scooping.
Can I reduce the sugar?
You can, but sugar affects texture and freezing point. Reducing it may result in a harder, icier final product. For a healthier option, consider substituting a portion with a sweetener designed for freezing.
Common Mistakes to Avoid
Avoid these pitfalls for creamier results. First, do not skip chilling the strawberry puree; adding it warm will melt the churned base and create ice crystals. Second, ensure your ice cream maker’s inner bowl is completely solidly frozen (usually 24 hours). Third, do not over-churn once the mixture is thick, as this can lead to a buttery, grainy texture. Finally, when swirling, use a knife or spatula for gentle ribbons; over-mixing will fully incorporate the puree and you’ll lose the beautiful swirl effect.
Conclusion
Homemade Strawberry Swirl Ice Cream is a rewarding project that yields a far superior treat to most store-bought versions. The process of creating the creamy vanilla base and the vibrant, fresh strawberry swirl is simple and enjoyable. By following this guide and avoiding common errors, you’ll create a stunning dessert that captures the essence of summer in every scoop. The joy of sharing this homemade delight is the perfect finale to any meal or a special treat on a warm day. Save this recipe and enjoy the taste of pure, swirled happiness.