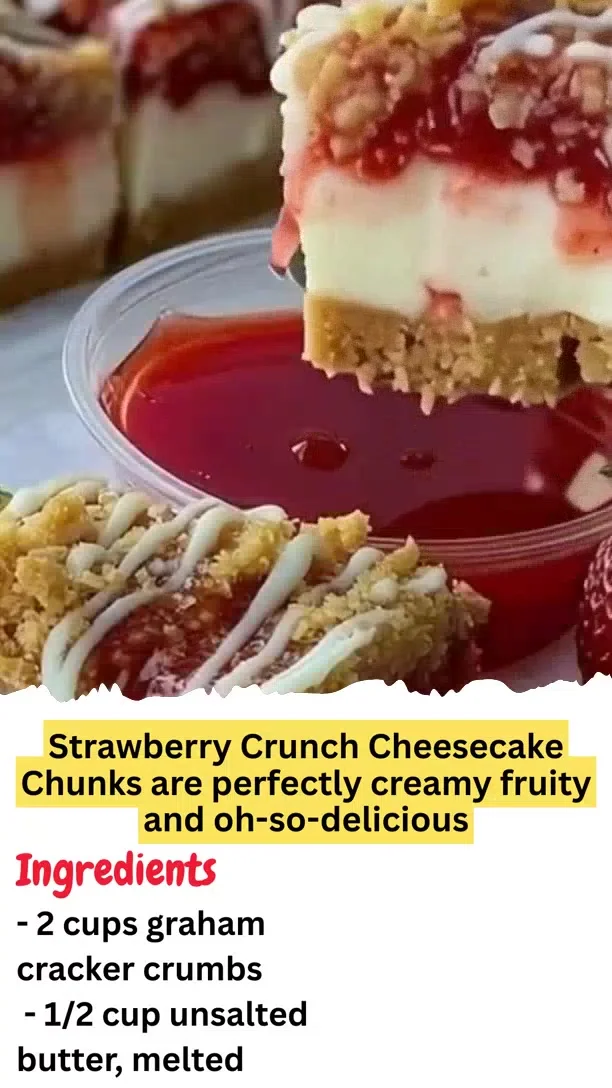
Description
Ingredients:
- 2 cups graham cracker crumbs
- 1/2 cup unsalted butter, melted
- 1/4 cup granulated sugar
- 2 (8 oz) packages cream cheese, softened
- 1/2 cup granulated sugar
- 2 large eggs
- 1 teaspoon vanilla extract
- 1 1/2 cups strawberry pie filling or strawberry preserves
- 1/2 cup all-purpose flour
- 1/2 cup brown sugar
- 1/4 cup unsalted butter, softened
- 1/2 cup crushed golden cookies (like vanilla wafers)
- 1/2 cup melted white chocolate (optional)
Instructions:
1. First, let’s get that oven warmed up to 325°F (163°C). Grab your trusty 9x13-inch baking pan and line it with parchment paper—the perfect base for our cheesecake delight.
2. In a mixing bowl, combine the graham cracker crumbs, melted butter, and granulated sugar, stirring until everything is nicely blended. Press this mixture into the bottom of your prepared pan to form a crust that’s both firm and tasty.
3. Now, let’s make the cheesecake layer! In another bowl, beat the softened cream cheese and the 1/2 cup of granulated sugar until smooth and creamy. Incorporate the eggs one at a time, followed by the vanilla extract, ensuring everything is well mixed in.
4. Spread the luscious cheesecake mixture evenly over the crust you just made.
5. Next, take that beautiful strawberry filling and dollop it over the cheesecake layer, using a spatula to spread it gently to cover the surface.
6. For that crunchy topping, mix together the flour, brown sugar, softened butter, and crushed golden cookies in a separate bowl until you get a crumbly texture. Sprinkle this mixture evenly over the strawberry layer.
7. Pop the pan into the oven and bake for 35–40 minutes, or until the topping is set and just lightly golden brown.
8. Once it’s done, let your cheesecake chill completely before refrigerating it for at least 4 hours (or, if you can resist the temptation, overnight!).
9. When you’re ready to indulge, cut the chilled cheesecake into delightful chunks and, if you’re feeling fancy, drizzle some melted white chocolate on top just before serving.
Enjoy every bite of these Strawberry Crunch Cheesecake Chunks—they’re bound to be a hit!
#CheesecakeHeaven #DessertLover #SweetTreats #BakingJoy #FoodieFun
Step-by-Step Guide
Follow these detailed instructions for perfect results. First, ensure all ingredients, especially the cream cheese and butter, are at room temperature for smooth blending. Preheat your oven to 325°F (163°C) and line a 9x13-inch pan with parchment paper, leaving overhang on two sides for easy removal later.
For the crust, thoroughly mix graham cracker crumbs, 1/2 cup melted butter, and 1/4 cup granulated sugar until it resembles wet sand. Press this firmly and evenly into the pan's bottom using a flat-bottomed cup. For the filling, use an electric mixer on medium speed to beat the cream cheese and 1/2 cup granulated sugar until completely smooth, scraping the bowl down. Add eggs one at a time, mixing just until incorporated after each, then mix in vanilla. Pour over the crust and spread evenly.
Dollop the strawberry filling in small spoonfuls across the cheesecake layer, then use a knife or spatula to gently swirl it just into the surface. For the crumble, combine flour, brown sugar, softened butter, and crushed cookies with a fork or your fingers until clumpy. Sprinkle this evenly over the strawberry layer. Bake on the center rack for 35-40 minutes until the crumble is lightly golden and the cheesecake edges are set (the center will still jiggle slightly). Cool completely in the pan on a wire rack, then refrigerate for at least 4 hours, or ideally overnight, before lifting out using the parchment paper to cut.
Serving Suggestions
These cheesecake chunks are versatile. For an elegant presentation, serve them in individual paper liners on a dessert platter. Drizzle with melted white or dark chocolate and a fresh strawberry half. They pair wonderfully with a scoop of vanilla bean ice cream or a dollop of whipped cream. For a summer twist, serve alongside a berry compote or a light lemon sorbet to balance the richness.
How-to Summary
To summarize: Prepare a graham cracker crust and press it into a lined pan. Mix a simple cream cheese filling and pour it over the crust. Top with swirled strawberry filling and a buttery cookie crumble. Bake until set, then chill thoroughly before cutting into chunks and optionally drizzling with chocolate.
Frequently Asked Questions
Can I use fresh strawberries instead of pie filling?
Yes, but you must cook them down with sugar and a thickener like cornstarch to create a compote, as fresh berries will release too much water during baking.
How should I store leftovers?
Keep the chunks in an airtight container in the refrigerator for up to 5 days. They can also be frozen for up to 2 months; thaw overnight in the fridge.
My cream cheese mixture is lumpy. What went wrong?
This usually means the cream cheese was too cold. Ensure it is fully softened at room temperature for at least an hour before mixing.
Can I make this gluten-free?
Absolutely. Use gluten-free graham crackers for the crust and a 1-to-1 gluten-free flour blend in the crumble topping.
Why did my crumble topping sink into the cheesecake?
This happens if the cheesecake layer is too thin or runny. Ensure you're using full-fat cream cheese and the correct size pan, and don't over-mix the eggs, which can incorporate too much air.
Common Mistakes to Avoid
- Over-mixing the batter after adding eggs: This incorporates excess air, which can cause the cheesecake to puff and crack as it bakes and cools.
- Not chilling long enough: Cutting before the cheesecake is fully set will result in a messy presentation. Patience is key.
- Using cold ingredients: Cold cream cheese or eggs will not blend smoothly, leading to a lumpy filling.
- Pressing the crumble into the strawberry layer: Simply sprinkle it on; pressing it down inhibits the crumble's texture.
Conclusion
These Strawberry Crunch Cheesecake Chunks masterfully combine creamy, fruity, and crunchy textures into one irresistible dessert. By following the detailed guide and avoiding common pitfalls, you can create a stunning treat that’s perfect for parties, potlucks, or a special family indulgence. The make-ahead nature of this dessert makes it a reliable favorite for any occasion. Happy baking!