Peanut Butter Chocolate Crispy Roll
Description
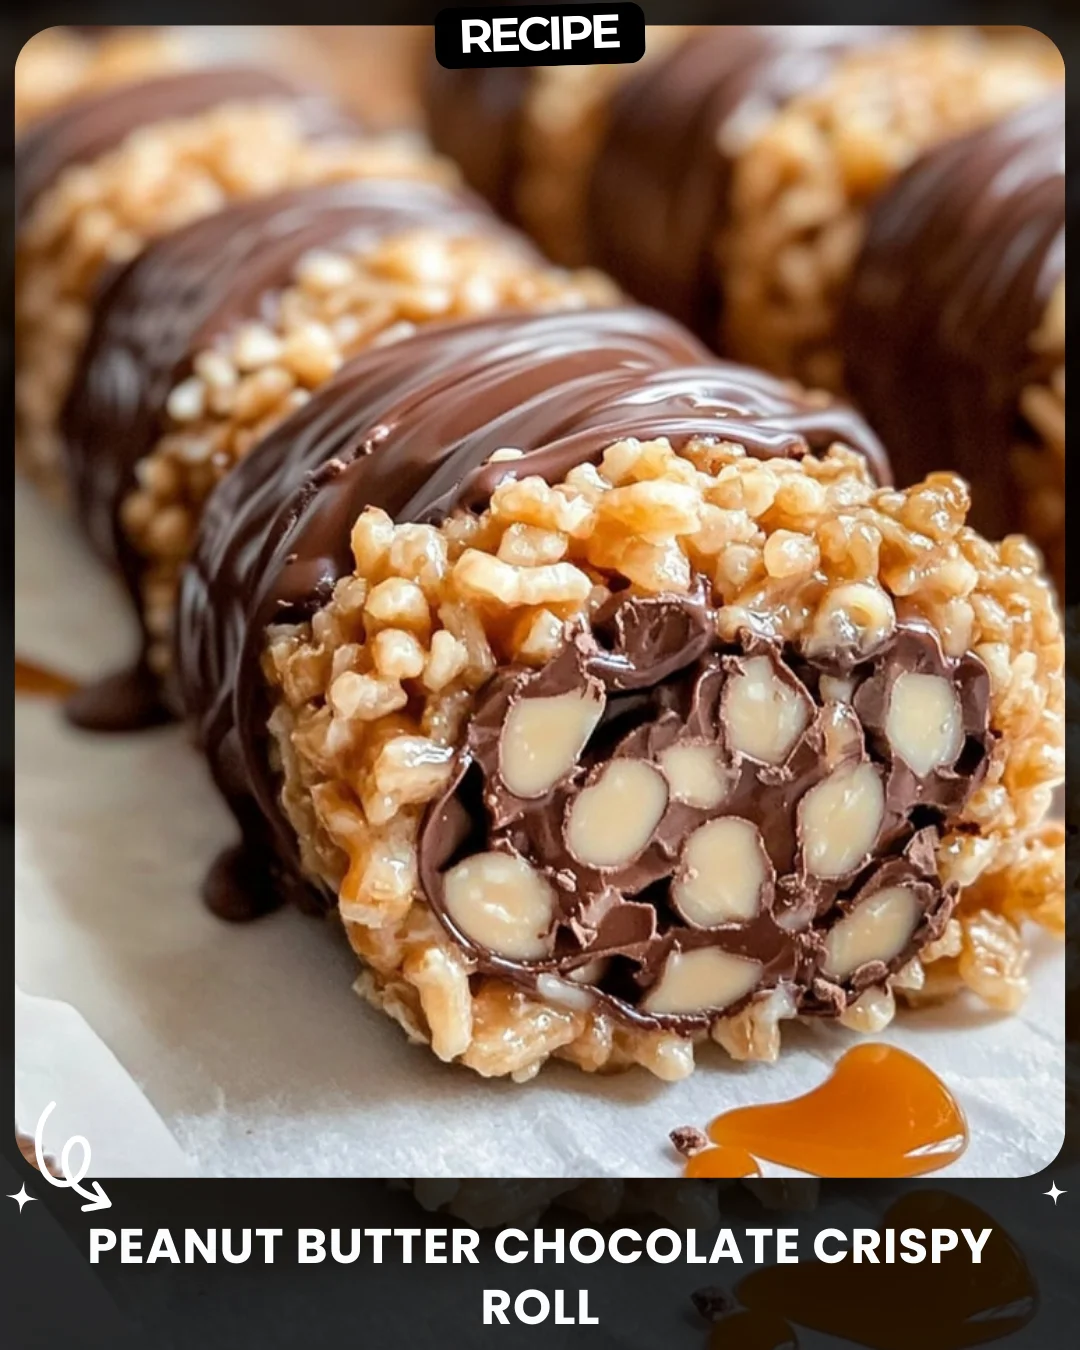
Peanut Butter Chocolate Crispy Roll
This simple yet decadent dessert is perfect for family gatherings!
Ingredients:
3 cups rice cereal
1 cup peanut butter
½ cup agave syrup
1 cup chocolate hazelnut spread
Instructions:
Melt peanut butter and agave syrup together.
Combine with rice cereal until fully coated.
Spread the mixture on wax paper, layer with hazelnut spread, and roll up.
Refrigerate for 2 hours, slice, and enjoy!
#NuttyChocolateCrispy
Step-by-Step Guide
Follow these detailed instructions for a perfect roll every time. First, line a baking sheet or large cutting board with a piece of wax paper or parchment paper. In a medium saucepan, gently melt the peanut butter and agave syrup over low heat, stirring constantly until smooth and fully combined. In a large mixing bowl, pour the melted peanut butter mixture over the rice cereal. Use a spatula to fold and stir until every piece of cereal is evenly and thoroughly coated.
Transfer the coated cereal mixture onto your prepared wax paper. With slightly damp hands or a sheet of additional wax paper, press and shape the mixture into a rough rectangle, about 1/2 inch thick. Warm the chocolate hazelnut spread for 15-20 seconds in the microwave to make it easier to spread. Using an offset spatula or knife, spread an even layer of the hazelnut spread over the entire surface of the cereal rectangle, leaving a small border at one of the long edges.
Starting from the long edge opposite the border, carefully use the wax paper to lift and begin rolling the mixture tightly into a log. Continue rolling, using the paper to guide it, until sealed. Wrap the finished log tightly in the wax paper and then in plastic wrap to hold its shape.
Serving Suggestions
Serve these crispy rolls as a delightful dessert or sweet snack. For a beautiful presentation, arrange the slices on a platter and dust lightly with powdered sugar or cocoa powder. They pair wonderfully with a scoop of vanilla ice cream or a dollop of whipped cream. For a festive touch, drizzle melted dark chocolate or sprinkle chopped peanuts over the slices before serving.
How-to Summary
In short: Melt peanut butter and syrup, mix with cereal, press into a rectangle, spread with chocolate hazelnut spread, roll into a log, chill until firm, and slice.
Frequently Asked Questions
Can I use honey instead of agave syrup?
Yes, honey is an excellent 1:1 substitute for agave syrup and will provide a similar binding sweetness.
My roll is cracking when I try to slice it. What happened?
Cracking usually means the roll was not chilled long enough. Ensure it is refrigerated for a full 2 hours, or even overnight, to become completely firm before slicing.
Is there a substitute for the chocolate hazelnut spread?
Absolutely. You can use any nut butter, melted chocolate, or even a seed butter for a nut-free version.
How should I store leftovers?
Store slices in an airtight container in the refrigerator for up to 5 days. They can also be frozen for up to a month; separate layers with parchment paper.
Can I add other ingredients to the cereal mix?
Definitely! Consider adding mini chocolate chips, crushed pretzels, or a sprinkle of sea salt to the cereal mixture for extra texture and flavor.
Common Mistakes to Avoid
- Heating the peanut butter mixture too quickly or on high heat, which can cause it to burn or separate.
- Not coating the cereal thoroughly, leading to a crumbly mixture that won’t hold its shape.
- Spreading the hazelnut layer too thickly, which can ooze out when rolling.
- Skipping the full chilling time, resulting in a soft roll that is impossible to slice cleanly.
- Using warm hands to shape the mixture, as it will become sticky; damp hands prevent this.
Conclusion
This Peanut Butter Chocolate Crispy Roll is a testament to how simple ingredients can create a truly impressive and delicious treat. With its satisfying crunch, rich chocolate-hazelnut layer, and sweet peanut butter base, it’s sure to become a requested favorite. By following the step-by-step guide and tips provided, you can easily master this no-bake dessert and customize it to your taste. Enjoy the process and the delicious results!