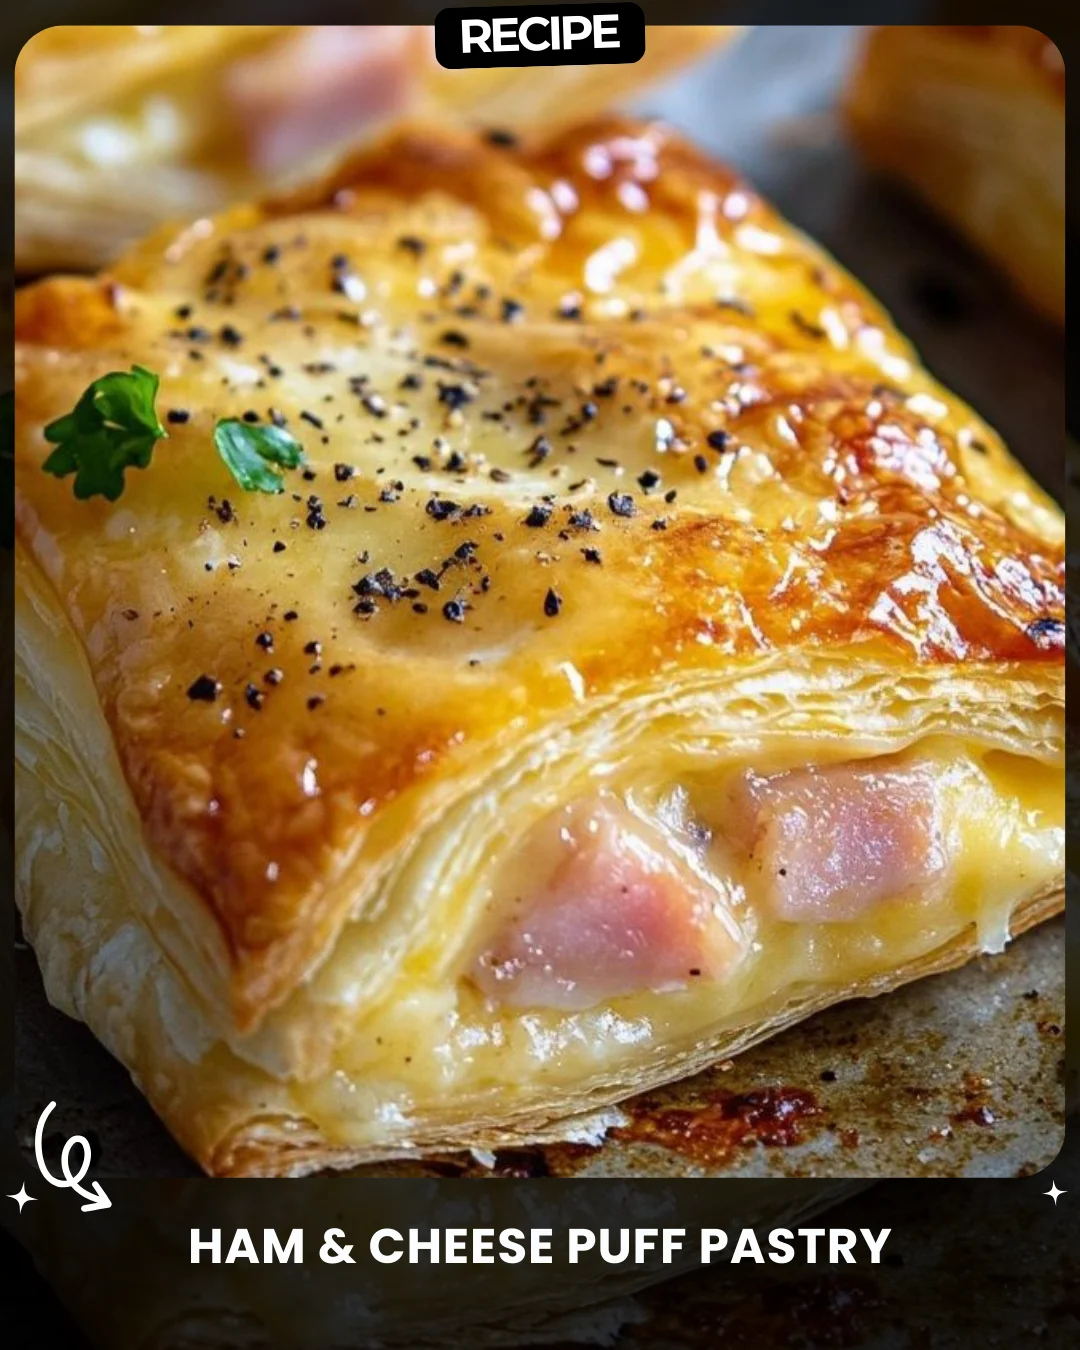
Ham & Cheese Puff Pastry
 3:40
3:40
Ina Garten's Ham and Cheese in Puff Pastry | Barefoot Contessa | Food ...
Description
Ham & Cheese Puff Pastry
Ingredients:
1 sheet puff pastry, thawed
1/2 cup diced ham
1/2 cup shredded mozzarella cheese
1/2 cup shredded cheddar cheese
1 egg, beaten (for egg wash)
1/2 teaspoon black pepper
1 tablespoon fresh parsley, chopped
Instructions:
Preheat oven to 375°F (190°C) and line a baking sheet with parchment paper. Roll out the puff pastry and cut it into squares. Place a small amount of diced ham and both cheeses in the center of each square. Fold over the pastry to create a pocket, sealing the edges with a fork. Brush with egg wash and sprinkle with black pepper. Bake for 20-25 minutes until golden and crispy. Garnish with fresh parsley before serving.
Step-by-Step Guide
1. Prep: Thaw puff pastry according to package directions. Line a baking sheet with parchment paper. Preheat your oven to 375°F (190°C).
2. Cut: On a lightly floured surface, roll the pastry sheet out slightly. Use a sharp knife or pizza cutter to cut it into 9 or 12 equal squares.
3. Fill: In a small bowl, mix the diced ham, mozzarella, and cheddar. Place 1-2 tablespoons of the ham-cheese mixture in the center of each square, leaving a clear border.
4. Seal: Fold one corner of a square over the filling to the opposite corner, creating a triangle. Press the edges firmly with your fingers. Crimp the sealed edge with the tines of a fork to ensure it’s completely closed. Repeat for all squares.
5. Finish: Transfer the pastries to the prepared baking sheet. Brush the tops generously with the beaten egg wash. This creates a golden, shiny finish. Sprinkle with black pepper.
6. Bake: Bake for 20-25 minutes, or until the pastries are deeply golden brown and puffed. Let cool on the sheet for 5 minutes before garnishing with fresh parsley.
Serving Suggestions
These pastries are incredibly versatile. Serve them warm as a party appetizer with a side of honey mustard or garlic aioli for dipping. For a hearty breakfast or brunch, pair them with a fresh fruit salad or scrambled eggs. They also make a fantastic, portable lunchbox treat or a quick dinner alongside a simple green salad or a bowl of tomato soup.
How-to Summary
Thaw, roll, and cut puff pastry into squares. Fill centers with a mix of diced ham and shredded cheeses. Fold into triangles, seal edges with a fork, brush with egg wash, and sprinkle with pepper. Bake at 375°F for 20-25 minutes until golden brown. Garnish and serve.
Frequently Asked Questions
Can I make these ahead of time? Yes! Assemble the pastries, place them on the baking sheet, and freeze until solid. Transfer to a freezer bag. Bake from frozen, adding 5-10 minutes to the baking time.
Can I use different cheeses? Absolutely. Gruyère, Swiss, or pepper jack are excellent choices. Ensure any cheese you use is grated for even melting.
My pastry didn’t puff much. Why? This is often due to overhandling, which warms the butter in the dough, or not sealing the edges properly, allowing steam (the leavening agent) to escape.
Is the egg wash necessary? While optional, it is highly recommended. The egg wash promotes browning and gives the pastries a professional, glossy finish.
Can I add other ingredients? Certainly. Consider adding a teaspoon of Dijon mustard inside, or mix in finely chopped spinach, caramelized onions, or cooked bacon with the ham.
Common Mistakes to Avoid
- Using warm pastry: Work with cold, but thawed, pastry to keep the butter layers distinct for maximum puff.
- Overfilling: Too much filling will cause leaks during baking and prevent proper sealing.
- Inadequate sealing: Press edges firmly and crimp with a fork. Any gap will result in melted cheese leaking out.
- Skipping the parchment paper: This prevents sticking and makes cleanup effortless.
- Under-baking: Bake until the pastry is a deep golden brown for the best texture and flavor.
Conclusion
These Ham & Cheese Puff Pastries are the epitome of easy elegance. With just a few simple ingredients and minimal effort, you can create an impressive dish that’s perfect for any occasion. By following the detailed steps and tips provided, you’ll avoid common pitfalls and achieve flaky, golden, and delicious results every time. They are a guaranteed crowd-pleaser that proves fantastic food doesn’t have to be complicated.