Description
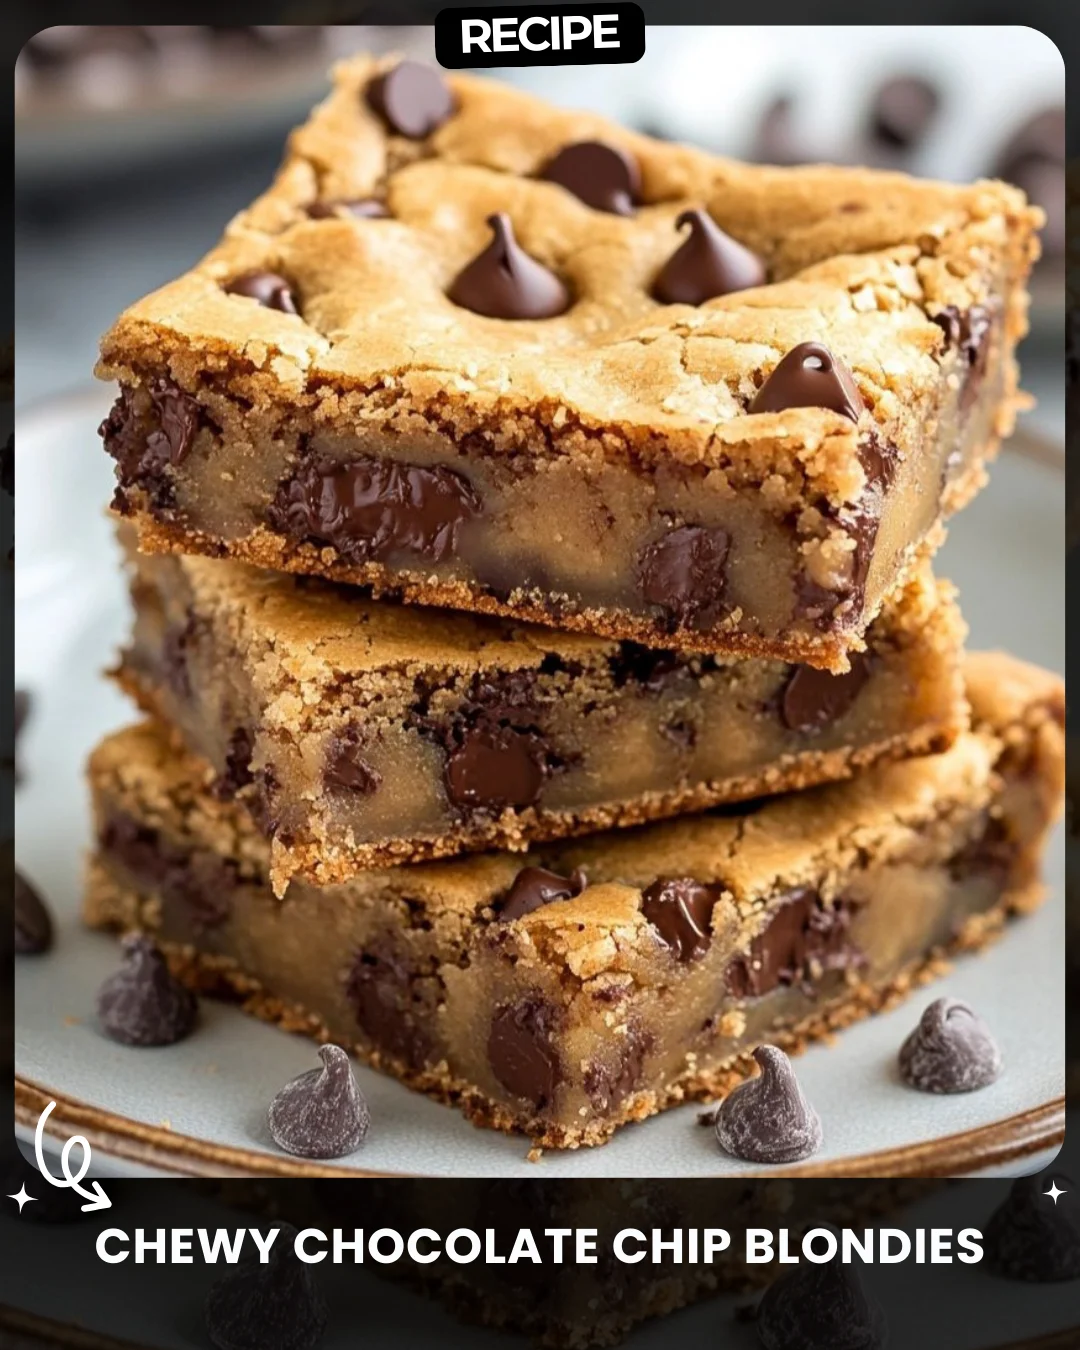
Chewy Chocolate Chip Blondies
Ingredients:
1 cup unsalted butter, melted
1 ½ cups brown sugar
2 eggs
2 tsp vanilla extract
2 cups all-purpose flour
1 tsp baking powder
½ tsp salt
1 cup chocolate chips (plus extra for topping)
Instructions:
Preheat oven to 175°C (350°F) and line a baking dish with parchment paper. In a bowl, whisk melted butter and brown sugar until smooth. Add eggs and vanilla, mixing well. In another bowl, combine flour, baking powder, and salt. Gradually fold dry ingredients into wet ingredients. Stir in chocolate chips. Spread the batter evenly into the dish and sprinkle extra chocolate chips on top. Bake for 25-30 minutes until golden brown. Let cool before slicing.
Step-by-Step Guide
Follow these detailed steps for perfect blondies every time. First, ensure your oven rack is in the center position and preheat to 175°C (350°F). Line an 8x8 or 9x9 inch baking dish with parchment paper, leaving an overhang on two sides for easy removal. In a large mixing bowl, whisk the melted butter and brown sugar vigorously for a full minute until it becomes a smooth, glossy paste. This step is crucial for texture. Add the eggs one at a time, whisking thoroughly after each addition, then mix in the vanilla. In a separate bowl, sift together the flour, baking powder, and salt. Add the dry ingredients to the wet mixture in three batches, folding gently with a spatula until just combined. Overmixing leads to toughness. Fold in the 1 cup of chocolate chips. Transfer the thick batter to your prepared pan, spreading it evenly into the corners. Sprinkle the top generously with extra chocolate chips and press them in lightly. Bake for 25-30 minutes. The edges should be golden and pulling away from the pan, and a toothpick inserted into the center should come out with a few moist crumbs, not wet batter.
Serving Suggestions
These blondies are delicious on their own but can be elevated for any occasion. Serve them warm with a scoop of vanilla ice cream and a drizzle of caramel sauce for a decadent dessert. For a festive touch, sprinkle with a pinch of flaky sea salt right after baking. They also pair wonderfully with a cold glass of milk, a hot coffee, or a creamy latte. For a party, cut them into smaller, bite-sized pieces for easy sharing.
How-to Summary
To summarize: Preheat oven and prepare pan. Whisk melted butter and brown sugar. Mix in eggs and vanilla. Combine dry ingredients separately. Fold dry into wet mixture. Stir in chocolate chips. Spread batter in pan, top with extra chips, and bake until golden. Cool completely before slicing into squares.
Frequently Asked Questions
Can I use salted butter? Yes, but omit the added ½ tsp salt in the recipe to avoid over-salting.
How do I store blondies to keep them chewy? Store in an airtight container at room temperature for up to 5 days. Placing a piece of bread in the container can help retain moisture.
Can I add nuts or other mix-ins? Absolutely! Replace ½ cup of chocolate chips with chopped walnuts, pecans, or even white chocolate chips and butterscotch morsels.
Why did my blondies turn out cakey? This is often due to overmixing the batter after adding the flour, which develops too much gluten. Fold gently until just combined.
Can I double this recipe? Yes, double all ingredients and bake in a 9x13 inch pan. You may need to add a few extra minutes to the baking time.
Common Mistakes to Avoid
- Using hot, freshly melted butter. Let it cool slightly so it doesn't cook the eggs.
- Over-baking. Remove them when the center is still slightly soft for the ideal chewy texture.
- Skipping the parchment paper, which makes removal and cleanup difficult.
- Slicing while warm. The blondies need time to set, so patience is key for clean cuts.
Conclusion
These Chewy Chocolate Chip Blondies are a simple yet irresistible treat that bridges the gap between cookie and brownie. By following the detailed guide and avoiding common pitfalls, you'll achieve a perfect batch with a rich, buttery flavor and a delightfully chewy texture every time. They are endlessly adaptable and guaranteed to become a staple in your baking repertoire. Enjoy the process and the delicious results!