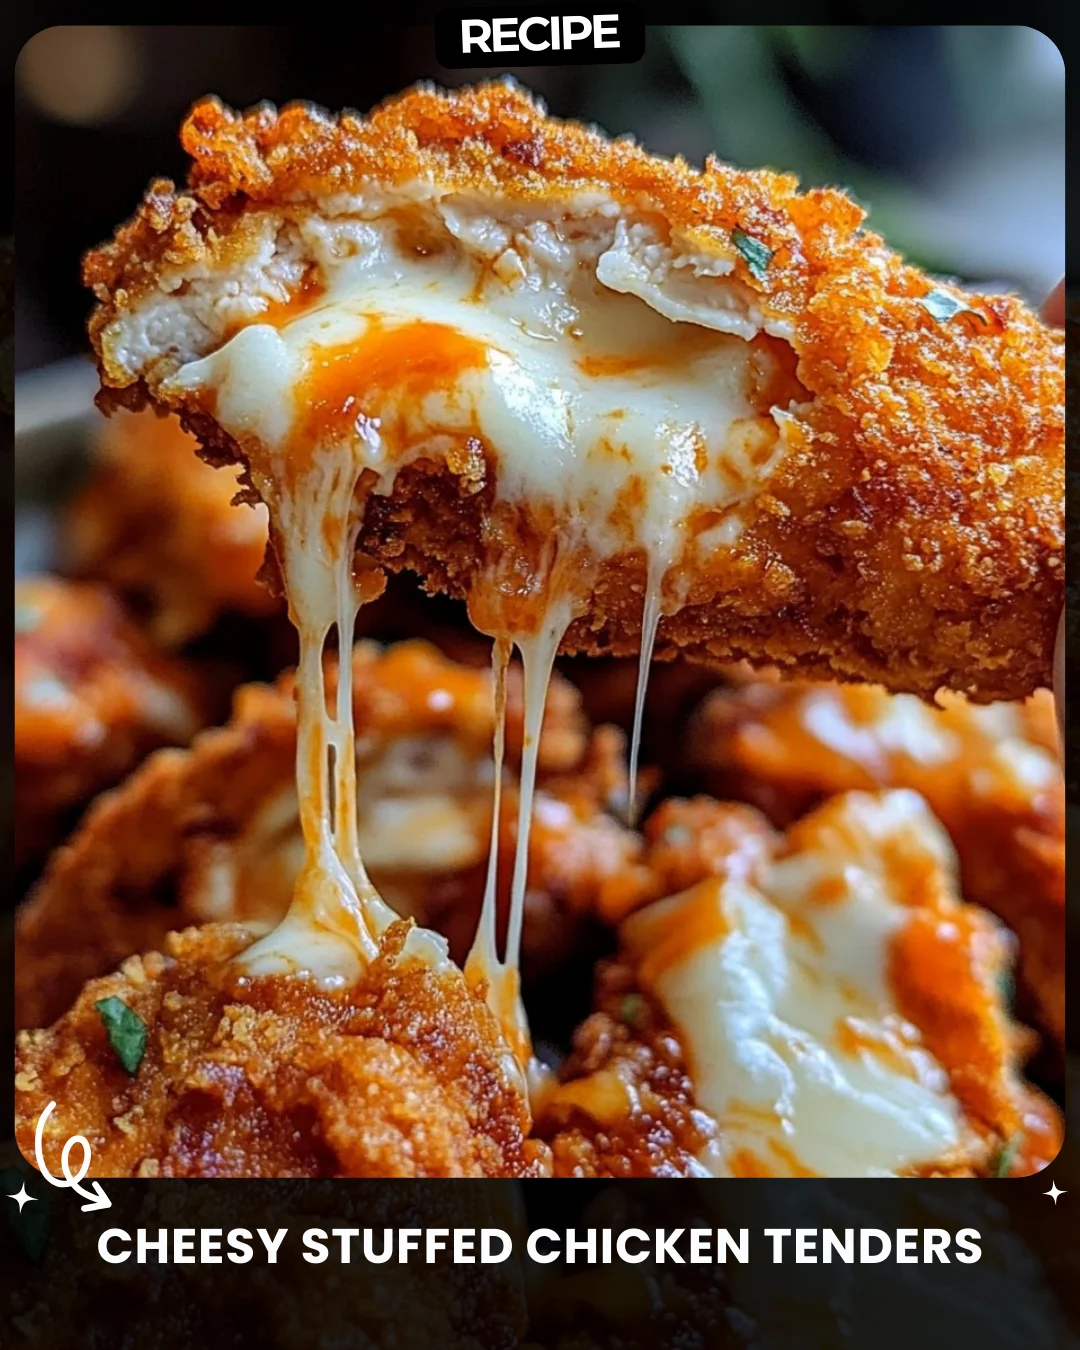
Cheesy Stuffed Chicken Tenders
Description
Cheesy Stuffed Chicken Tenders
These crispy, cheesy stuffed chicken tenders are filled with gooey melted cheese and then coated in a crispy breadcrumb coating. Perfect as an appetizer or a main dish!
Ingredients
:
4 boneless, skinless chicken breasts
1 cup mozzarella cheese, shredded
1/2 cup cream cheese
1/4 cup grated Parmesan cheese
1 teaspoon garlic powder
1 teaspoon paprika
1/2 teaspoon salt
1/2 teaspoon black pepper
1 cup all-purpose flour
2 large eggs, beaten
1 1/2 cups panko breadcrumbs
1 tablespoon olive oil
Marinara sauce (optional for dipping)
Instructions
:
Prepare the Chicken: Preheat your oven to 375°F (190°C). Cut the chicken breasts into tenders or slices, ensuring they are about 1 inch thick. Use a knife to create a small pocket in the middle of each chicken tender.
Make the Filling: In a small bowl, mix together the mozzarella, cream cheese, Parmesan cheese, garlic powder, paprika, salt, and pepper. Spoon the cheese mixture into the pockets of each chicken tender. Press the edges of the chicken to seal the cheese inside.
Coat the Chicken: Set up a breading station. First, dredge each stuffed chicken tender in flour, then dip it in the beaten eggs, and finally coat it in panko breadcrumbs. Repeat for each piece.
Cook the Chicken: Heat olive oil in a skillet over medium heat. Add the chicken tenders and cook for 3-4 minutes on each side, until golden brown and crispy. Then, transfer the tenders to a baking sheet and bake for 10-12 minutes, or until the chicken is fully cooked (internal temperature should reach 165°F).
Serve: Let the chicken tenders rest for a few minutes before serving. If desired, serve with marinara sauce for dipping.
These cheesy stuffed chicken tenders are crispy on the outside and ooey-gooey on the inside. Perfect for a tasty meal or snack!
Step-by-Step Guide
Follow this detailed process for perfect results every time. First, ensure your chicken breasts are uniform in thickness by placing them between plastic wrap and gently pounding them. This makes creating the pocket easier and ensures even cooking. For the filling, ensure the cream cheese is at room temperature for smooth mixing. When stuffing, use a small spoon or a piping bag for neatness, and don’t overfill—about 1 tablespoon per tender. To seal, you can secure the opening with a toothpick. For the breading, use one hand for dry ingredients (flour and panko) and the other for the wet egg wash to avoid clumpy fingers. Press the panko firmly to ensure a thick, even crust.
Serving Suggestions
These versatile tenders can be the star of many meals. For a hearty dinner, serve them alongside garlic mashed potatoes and roasted green beans. As a game-day appetizer, slice them into bite-sized pieces and serve with marinara, ranch, and honey mustard dips. For a lighter option, pair with a crisp Caesar salad or a fresh arugula salad with lemon vinaigrette. They also make a fantastic sandwich filling in a toasted brioche bun with lettuce and tomato.
How-to Summary
In summary, create a pocket in chicken tenders, fill with a blended cheese mixture, and seal. Bread using a standard three-step station (flour, egg, panko). Pan-sear to golden perfection, then finish baking in the oven to ensure the chicken is cooked through and the cheese is molten. Rest before serving with your favorite sides and dips.
Frequently Asked Questions
Can I prepare these ahead of time? Yes, you can assemble and bread the tenders up to a day in advance. Store them covered on a baking sheet in the refrigerator. Let them sit at room temperature for 15 minutes before cooking.
Can I use a different cheese? Absolutely. Pepper jack adds spice, while cheddar or gouda offer sharper flavor. Ensure any cheese you add is good for melting.
How do I know the chicken is cooked without cutting it open? Always use a meat thermometer. Insert it into the thickest part of the chicken (avoiding the cheese pocket) to confirm it has reached 165°F.
Can I make this gluten-free? Easily. Substitute the all-purpose flour with a gluten-free blend and use certified gluten-free panko breadcrumbs.
Why bake after pan-frying? Pan-frying creates the initial crispy crust, while baking ensures the thick chicken cooks through evenly without burning the coating.
Common Mistakes to Avoid
- Overfilling the pocket: This causes cheese to leak during cooking, resulting in a messy skillet and less flavorful tenders.
- Not sealing properly: Press the edges firmly. A toothpick can help secure larger openings.
- Skipping the rest time: Letting the tenders rest for 5 minutes after baking allows the juices to redistribute and prevents the cheese from burning your mouth.
- Crowding the skillet: Fry in batches to maintain the oil temperature and achieve an even, crispy sear on all sides.
Conclusion
These Cheesy Stuffed Chicken Tenders are a guaranteed crowd-pleaser, combining the comfort of juicy chicken with the irresistible pull of melted cheese inside a crispy shell. By following the detailed steps and tips provided, you can master this impressive yet straightforward dish. Perfect for a family dinner or entertaining guests, this recipe delivers maximum flavor and satisfaction with every bite. Enjoy the process and the delicious results!