 3:35
3:35
How to arrange 6 Assorted Mini Cheesecake Cuppies On a Platter🤭
Description
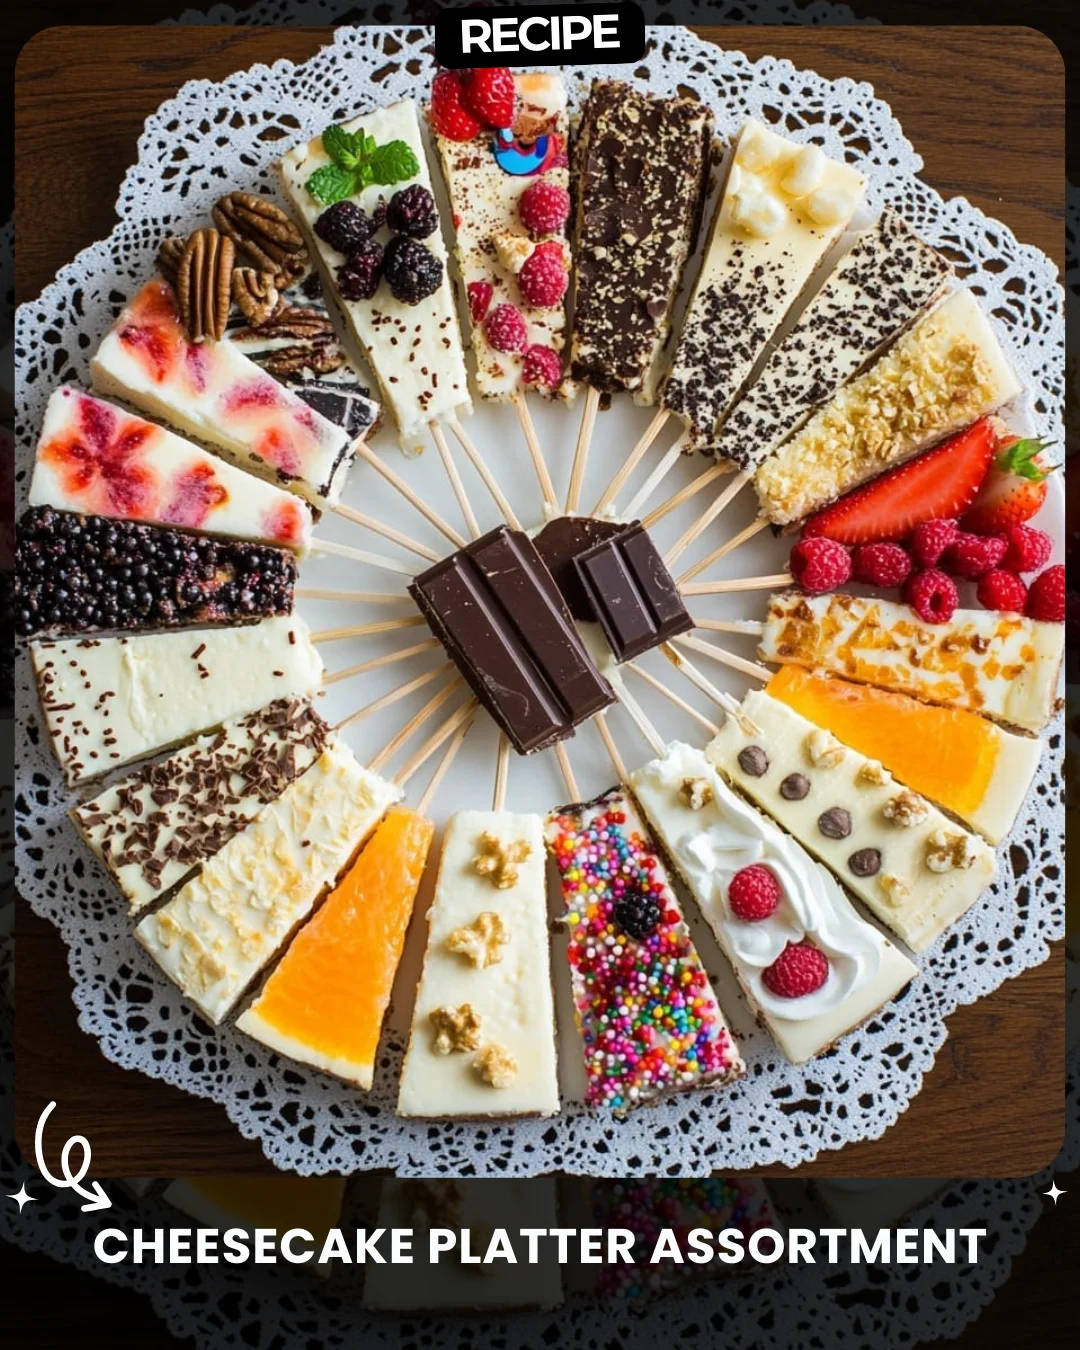
Cheesecake Platter Assortment
Ingredients:
Base Cheesecake:
1 standard cheesecake (store-bought or homemade)
Toppings for Decoration:
Fresh berries (strawberries, raspberries, blackberries)
Crushed nuts (walnuts, pecans, hazelnuts)
Chocolate chips and sprinkles
Whipped cream
Fruit jams (strawberry, apricot, blackberry)
Caramel and chocolate drizzle
Edible gold or silver pearls
Mint leaves (optional)
---
Instructions:
Slice the Cheesecake: Divide the cheesecake into even slices (12-16 depending on size).
Decorate Each Slice:
Fruit Toppings: Add fresh berries or a layer of jam.
Nutty Layers: Sprinkle crushed nuts over some slices.
Chocolate Variations: Add a drizzle of melted chocolate or top with chocolate chips.
Fun Sprinkles: Decorate a few slices with colorful sprinkles for a playful look.
Creamy Touches: Pipe a swirl of whipped cream and top with berries or edible pearls.
Arrange on a Platter: Place the decorated slices in a circle or fan shape on a lace-lined platter, alternating designs for visual appeal.
Place chocolate bars or other decorations in the center for a complete look.
Step-by-Step Guide
Follow this detailed guide to assemble a stunning and delicious cheesecake platter.
- Prepare Your Base: Start with a completely chilled cheesecake. A firm, cold cheesecake is much easier to slice cleanly. Use a large, sharp knife, dipping it in hot water and wiping it dry between each cut for perfect slices.
- Set Up Your Decorating Station: Before slicing, prepare all your toppings in small bowls. Have your whipped cream ready in a piping bag if using. This assembly-line setup makes the decorating process smooth and efficient.
- Slice and Separate: Slice the cheesecake into 12-16 even portions. Gently separate the slices slightly on your cutting board to give yourself room to work on each one individually.
- Decorate in Batches: Work on one topping theme at a time. For example, drizzle caramel over 3-4 slices, then move on to adding fresh berries to another set. This creates a cohesive yet varied assortment and is faster than finishing each slice completely before moving to the next.
- Final Platter Assembly: Carefully transfer your decorated slices onto the platter. Start by placing the largest or most elaborate slices first, spacing them evenly, then fill in the gaps with simpler slices.
Serving Suggestions
Elevate your cheesecake platter from great to extraordinary with these presentation tips. Use a large, elegant platter, preferably white or marble to make the colors pop. A lace or decorative paper doily adds a classic touch. Arrange slices in a deliberate pattern, such as a sunburst or alternating color themes. Fill the center of the platter with whole berries, sprigs of mint, small chocolate bars, or even a bouquet of edible flowers. Provide small serving utensils and plates for guests. For a beverage pairing, offer coffee, dessert wines, or a sparkling Moscato.
How-to Summary
To create a cheesecake platter, chill and slice one standard cheesecake. Prepare an array of toppings like fresh fruit, nuts, sauces, and whipped cream. Decorate individual slices with different topping combinations for variety. Artfully arrange the slices on a large platter, filling the center with complementary decorations for a stunning visual impact.
Frequently Asked Questions
Can I make this ahead of time?
Yes, but with strategy. Decorate the cheesecake slices and arrange them on the platter up to 2 hours before serving. Keep it refrigerated until ready to serve. Add whipped cream and very juicy berries at the last minute to prevent sogginess.
What’s the best way to store leftovers?
Carefully transfer leftover slices to an airtight container, separating layers with parchment paper. Most decorated slices will keep for 2-3 days in the fridge, though toppings like whipped cream may wilt.
Can I use a no-bake cheesecake?
Absolutely. A no-bake cheesecake works perfectly. Ensure it is fully set and very cold before slicing to maintain clean edges during handling.
How do I prevent the base from getting soggy?
The key is timing. Avoid topping slices with very wet ingredients (like syrupy fruit) too far in advance. If using jam, apply a thin layer just before serving.
What are some savory pairing ideas?
Balance the sweetness with mild cheeses like brie or aged gouda on a separate board. Salty nuts and crisp crackers also provide a nice contrast for the palate.
Common Mistakes to Avoid
- Slicing a Warm Cheesecake: This causes crumbling and messy edges. Always chill thoroughly first.
- Overcrowding the Platter: Leave a small amount of space between slices so toppings don’t get smeared and each design stands out.
- Using Only One Topping: The beauty of a platter is variety. Mix textures (crunchy nuts, smooth cream) and colors for maximum appeal.
- Neglecting the Platter Center: An empty center looks unfinished. Use garnishes to create a lush, abundant display.
- Forgetting Dietary Restrictions: Consider labeling slices with major allergens like nuts, or keep nuts in a separate bowl for guests to add themselves.
Conclusion
Creating a decorative cheesecake platter is a simple yet impressive way to serve dessert for any gathering. By starting with a single base and unleashing your creativity with a variety of toppings, you can craft a visually stunning centerpiece that caters to diverse tastes. Remember the key principles: work with a cold cake, decorate in themes, and pay attention to presentation. This approach transforms a classic dessert into a customizable, shareable experience that is sure to delight your guests and make any occasion feel special.