


Cheesecake Dessert Platter
Description
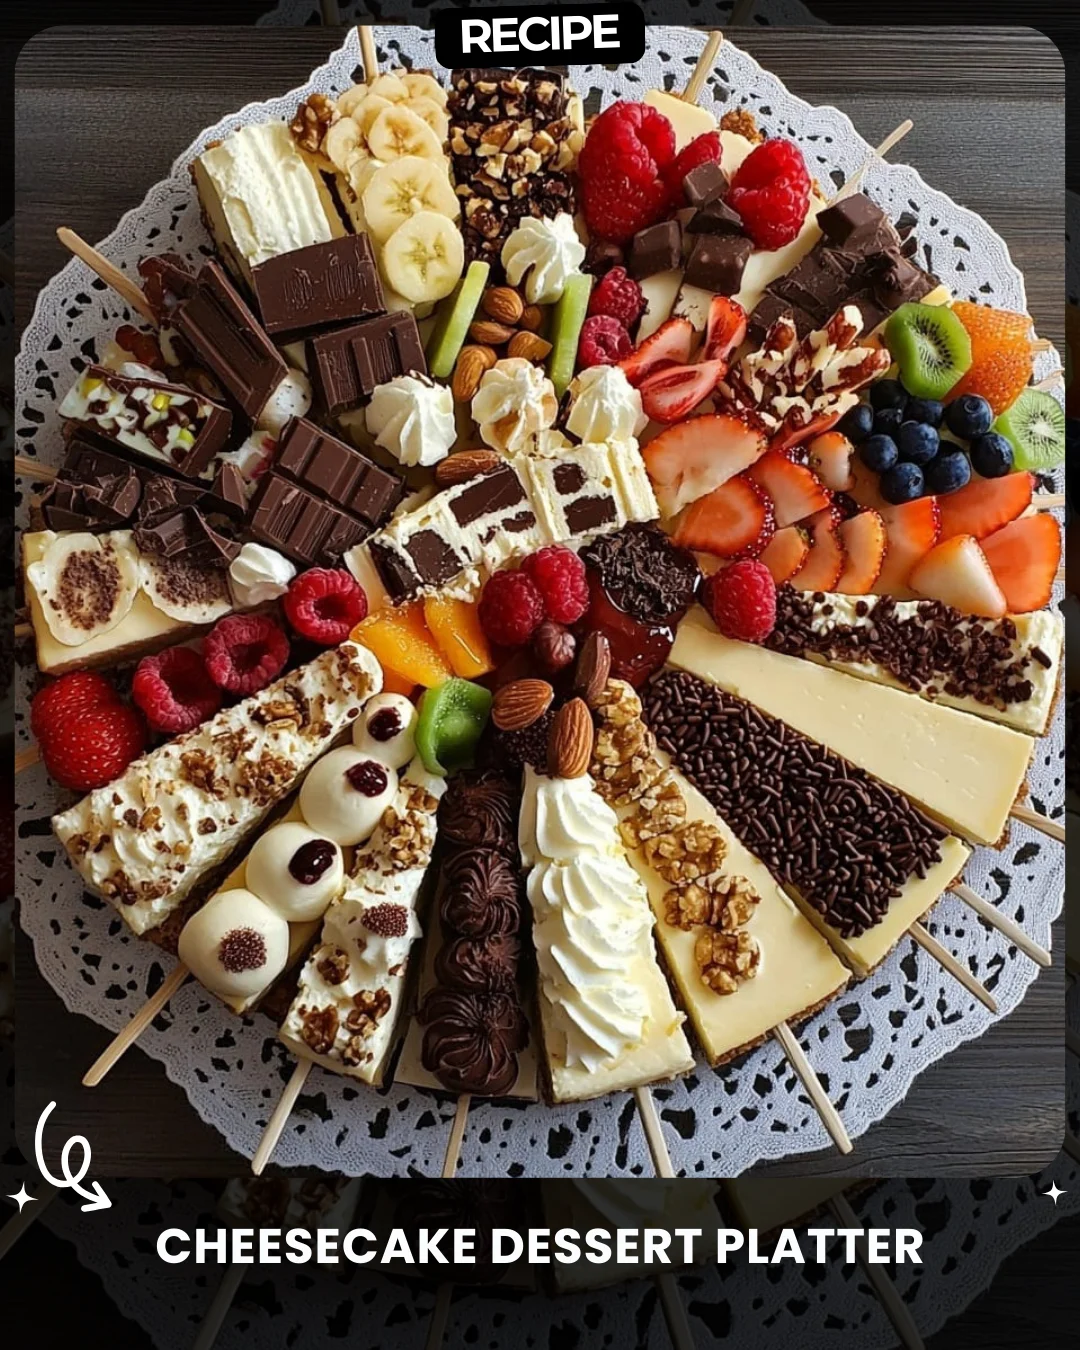
Cheesecake Dessert Platter
Ingredients:
Variety of cheesecake slices (classic, chocolate, fruit-flavored)
Fresh fruits: strawberries, blueberries, kiwi, banana, raspberries
Assorted toppings: chopped nuts, chocolate chunks, sprinkles
Whipped cream
Chocolate truffles or bonbons
Decorative skewers or sticks
—
Instructions:
1. Prepare the cheesecake slices:
Cut the cheesecakes into even slices. Insert skewers into the base of each slice for easy serving.
2. Add toppings to slices:
Decorate the cheesecake slices with various toppings like nuts, chocolate sprinkles, and whipped cream.
3. Arrange the platter:
On a round serving tray, place the cheesecake slices in a fan-like arrangement, with skewers pointing outward.
4. Garnish with fruits and chocolates:
Fill the spaces between slices with fresh fruit, chocolate chunks, and truffles for added variety and color.
5. Final touches:
Drizzle melted chocolate or caramel over the platter for a sophisticated touch. Place the platter on a doily or decorative paper for an elegant presentation.
Step-by-Step Guide
Follow this detailed guide to assemble a stunning and delicious cheesecake dessert platter.
- Prepare Your Base: Select a large, round platter or a decorative wooden board. Place a doily or a piece of decorative parchment paper in the center for an elegant touch.
- Skewer the Cheesecake: Cut your assorted cheesecakes into uniform, bite-sized slices or squares. Carefully insert a decorative skewer or a sturdy toothpick into the base of each piece, ensuring it is secure for easy grabbing.
- Create the Fan Layout: Begin arranging the skewered cheesecake slices around the outer edge of the platter. Position them so the skewers point outward like the rays of the sun, creating a fan effect. Leave space between each slice.
- Infill with Fruits & Treats: Wash and prepare your fresh fruits. In the spaces between the cheesecake slices, place small clusters of berries, kiwi slices, and banana pieces. Tuck chocolate truffles and bonbons into the gaps for a luxurious element.
- Add Toppings & Drizzle: Now, decorate the individual cheesecake slices with dollops of whipped cream, a sprinkle of chopped nuts, or a few chocolate chunks. Finally, drizzle the entire platter with melted chocolate or caramel sauce for a professional finish.
Serving Suggestions
Serve the platter immediately after assembly. Provide small plates and napkins for guests. For a cohesive theme, consider a platter that matches a holiday color scheme (e.g., red and green for Christmas, pastels for Easter). Pair with coffee, dessert wines, or sparkling cider to complement the rich flavors.
How-to Summary
To build the platter: Skewer bite-sized cheesecake pieces. Arrange them in a fan shape on a decorated tray. Fill gaps with fresh fruit and chocolates. Top slices with nuts and whipped cream. Finish with a chocolate or caramel drizzle.
Frequently Asked Questions
Can I prepare any parts of this platter ahead of time?
Yes. You can cut the cheesecake and skewer it, then store it covered in the refrigerator for up to 4 hours. Wash and cut fruits (except bananas) a few hours ahead. Assemble the full platter just before serving.
What are good non-dairy alternatives for the cheesecake?
Many stores and bakeries offer excellent vegan or dairy-free cheesecakes made from cashews or coconut cream. Use coconut whipped cream as a topping alternative.
How do I prevent the banana slices from browning?
Toss banana slices in a little lemon or pineapple juice before adding them to the platter. Add them at the very last minute to minimize oxidation.
What if I don’t have decorative skewers?
Colorful toothpicks, small forks, or even pretzel sticks can be fun and functional alternatives for securing the cheesecake pieces.
How much cheesecake do I need per person?
Plan for 2-3 varied cheesecake bites per guest, assuming other desserts are available. For a dedicated dessert table, 3-4 pieces per person is a safe estimate.
Common Mistakes to Avoid
- Overcrowding the Platter: Leave some breathing room between items for visual appeal and easy grabbing.
- Using Soggy Toppings: Apply wet toppings like fruit compotes or syrups directly on slices just before serving to prevent a soggy crust.
- Ignoring Temperature: Do not let the platter sit at room temperature for more than two hours for food safety, especially with dairy products.
- Forgetting Dietary Labels: If serving to a group, consider small labels for different cheesecake flavors (e.g., “Gluten-Free,” “Contains Nuts”).
Conclusion
A cheesecake dessert platter is a versatile and impressive way to delight guests at any gathering. By combining a variety of textures and flavors—from creamy cheesecake and fresh fruit to rich chocolate and crunchy nuts—you create a memorable centerpiece. With this simple guide, you can confidently build a beautiful, delicious platter that is as enjoyable to look at as it is to eat. Happy entertaining!