Description
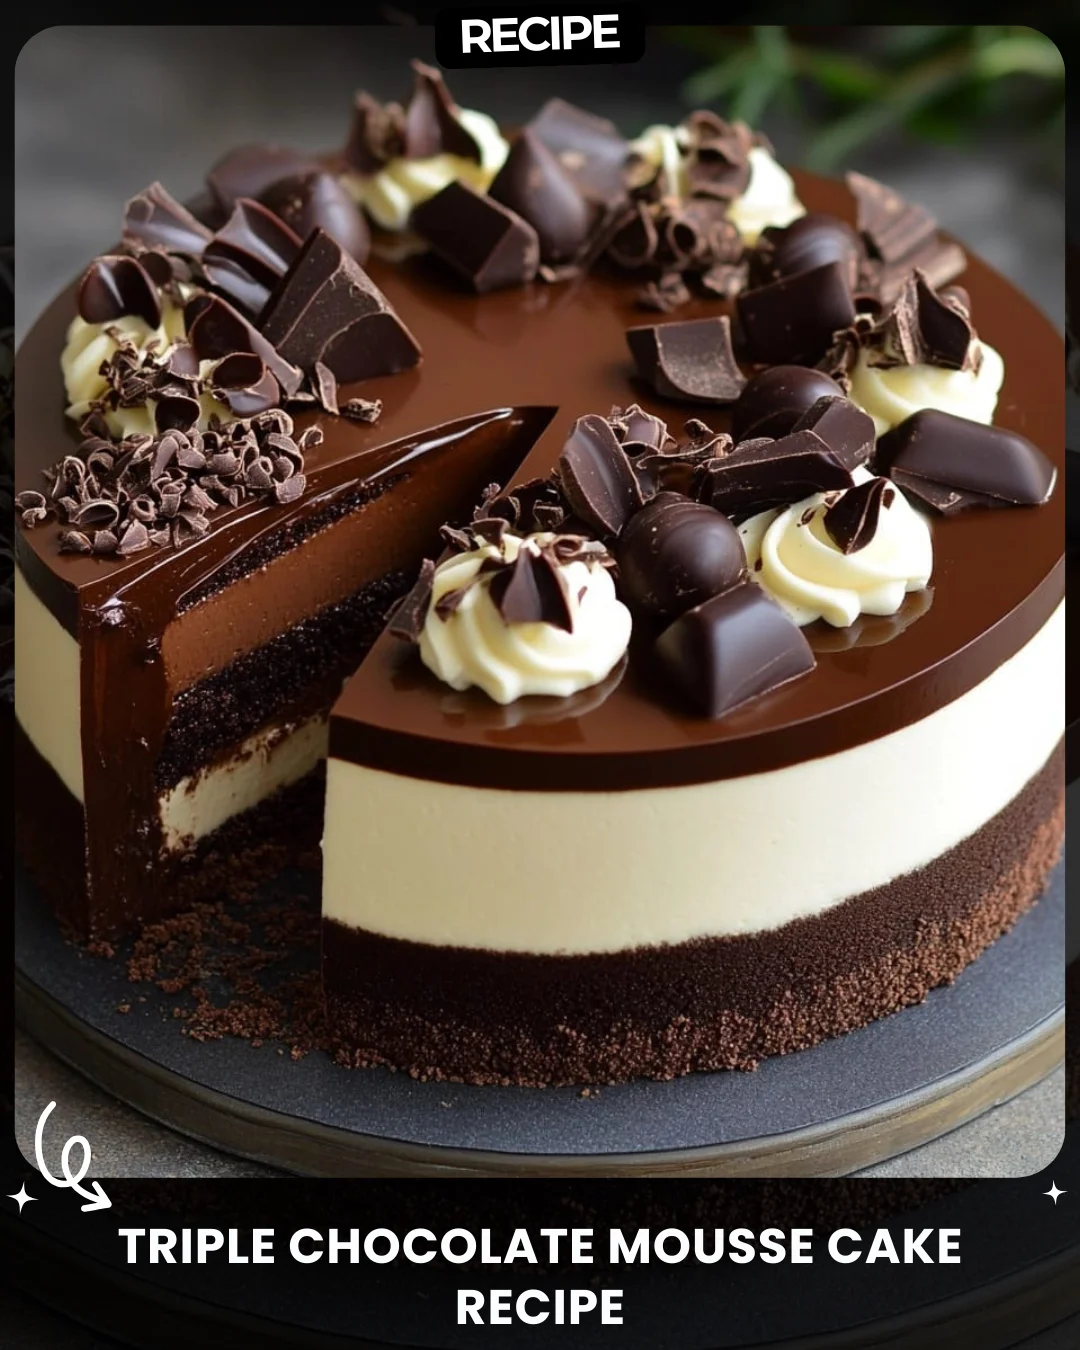
Triple Chocolate Mousse Cake Recipe
Ingredients:
For the Chocolate Sponge Base:
100g dark chocolate
100g butter
100g sugar
2 large eggs
50g flour
2 tbsp cocoa powder
1 tsp baking powder
Pinch of salt
For the White Chocolate Mousse:
150g white chocolate
300ml heavy cream, divided
1 tsp vanilla extract
2 sheets gelatin (or 1 tsp powdered gelatin)
For the Dark Chocolate Mousse:
150g dark chocolate
300ml heavy cream, divided
2 sheets gelatin (or 1 tsp powdered gelatin)
For the Chocolate Glaze:
100g dark chocolate
100ml heavy cream
1 tbsp butter
For Decoration:
Chocolate curls, truffles, or chunks (optional)
—
Instructions:
1. Prepare the Chocolate Sponge Base:
Preheat your oven to 180°C (350°F) and grease a 20cm (8-inch) springform pan.
Melt chocolate and butter over a double boiler. Let it cool slightly.
Whisk eggs and sugar until pale and fluffy, then fold in the melted chocolate mixture.
Sift flour, cocoa powder, baking powder, and salt into the mixture and gently fold to combine.
Pour batter into the pan and bake for 15-20 minutes. Let cool completely.
2. Make the White Chocolate Mousse:
Soften gelatin in cold water for 5 minutes.
Melt white chocolate with 100ml of heavy cream over low heat.
Stir in gelatin until dissolved, then let cool slightly.
Whip the remaining 200ml cream to soft peaks and fold into the chocolate mixture. Spread over the cooled sponge and refrigerate for 1-2 hours until set.
3. Make the Dark Chocolate Mousse:
Repeat the same steps as for the white chocolate mousse, using dark chocolate instead.
Spread the dark chocolate mousse over the white layer and refrigerate for 2 hours or until set.
4. Prepare the Chocolate Glaze:
Heat cream and butter until just simmering, then pour over the dark chocolate. Stir until smooth.
Let cool slightly, then pour over the cake, allowing it to drip down the sides. Chill until set.
5. Decorate and Serve:
Top with chocolate curls, truffles, or chunks as desired.
Slice and enjoy this luxurious triple chocolate treat!
Step-by-Step Guide
Follow this detailed guide for a flawless cake. After baking and cooling the sponge base, ensure your springform pan is sealed with acetate strips or plastic wrap around the inside edge to contain the mousse layers neatly. For the mousses, the key is temperature: the melted chocolate-gelatin mixture must be cool to the touch but not set before folding in the whipped cream. If it’s too warm, it will deflate the cream; if too cold, it will seize and create lumps. Fold using a large metal spoon or spatula with a gentle, sweeping motion until no white streaks remain. When adding the second mousse layer, pour it gently onto the back of a spoon held over the first layer to prevent it from breaking through the set surface.
Serving Suggestions
Serve this elegant cake chilled. For a restaurant-style presentation, dip a sharp knife in hot water and wipe it dry between each slice for perfectly clean cuts. Pair each slice with a dollop of lightly sweetened whipped cream, a few fresh raspberries, or a drizzle of raspberry coulis to cut through the richness. A small glass of dessert wine, a rich coffee, or a glass of cold milk makes an excellent accompaniment.
How-to Summary
This luxurious dessert is built in distinct stages: 1) Bake and cool a simple chocolate sponge base. 2) Create a white chocolate mousse layer by melting chocolate with cream, incorporating bloomed gelatin, and folding in whipped cream; chill until set. 3) Repeat the process to create a dark chocolate mousse layer, spreading it over the set white layer. 4) Finish with a simple, glossy chocolate glaze and decorative toppings. The process requires patience, with crucial chilling time between each major layer to ensure clean definition.
Frequently Asked Questions
Can I make this cake ahead of time? Absolutely. The cake can be made fully 2-3 days in advance. Store it covered in the refrigerator. The flavors often improve after a day.
What can I use instead of gelatin for a vegetarian version? Agar-agar is a suitable plant-based substitute. Use 1 teaspoon of agar powder per sheet of gelatin, dissolved in the warm cream mixture and brought to a brief simmer to activate.
My mousse turned out grainy. What went wrong? Graininess usually occurs if the chocolate seized or the gelatin wasn’t fully dissolved. Ensure no steam or water gets into the melting chocolate, and stir the gelatin thoroughly into the warm cream mixture until completely smooth.
Can I freeze this cake? Yes, you can freeze it for up to a month. Freeze it uncovered until solid, then wrap tightly in plastic wrap and foil. Thaw overnight in the refrigerator.
Why did my glaze crack when I poured it on? A cracking glaze is typically caused by temperature shock. Ensure both the glaze and the cake are cold, but not extremely cold. Let the glaze cool to just above body temperature before pouring it over the chilled cake.
Common Mistakes to Avoid
- Rushing the Chilling Steps: Not allowing each mousse layer to set fully before adding the next will cause the layers to blend together.
- Over-whipping the Cream: Whip the cream only to soft peaks. Stiff peaks make the mousse dense and difficult to fold smoothly.
- Warm Chocolate Mixture: Folding warm chocolate into whipped cream will cause the cream to melt and deflate, resulting in a runny mousse.
- Not Testing the Sponge: Use a toothpick to check the sponge base is done. An underbaked base will be soggy and may collapse under the weight of the mousse.
Conclusion
This Triple Chocolate Mousse Cake is a show-stopping dessert that masterfully contrasts textures and intensities of chocolate. While it requires careful attention to technique and timing, the process is a rewarding exercise in patisserie. By following the detailed steps, avoiding common pitfalls, and utilizing the make-ahead advantage, you can confidently create a professional-quality dessert that is sure to impress any guest. The final result—a beautiful, decadent, and perfectly layered cake—is well worth the effort.