Description
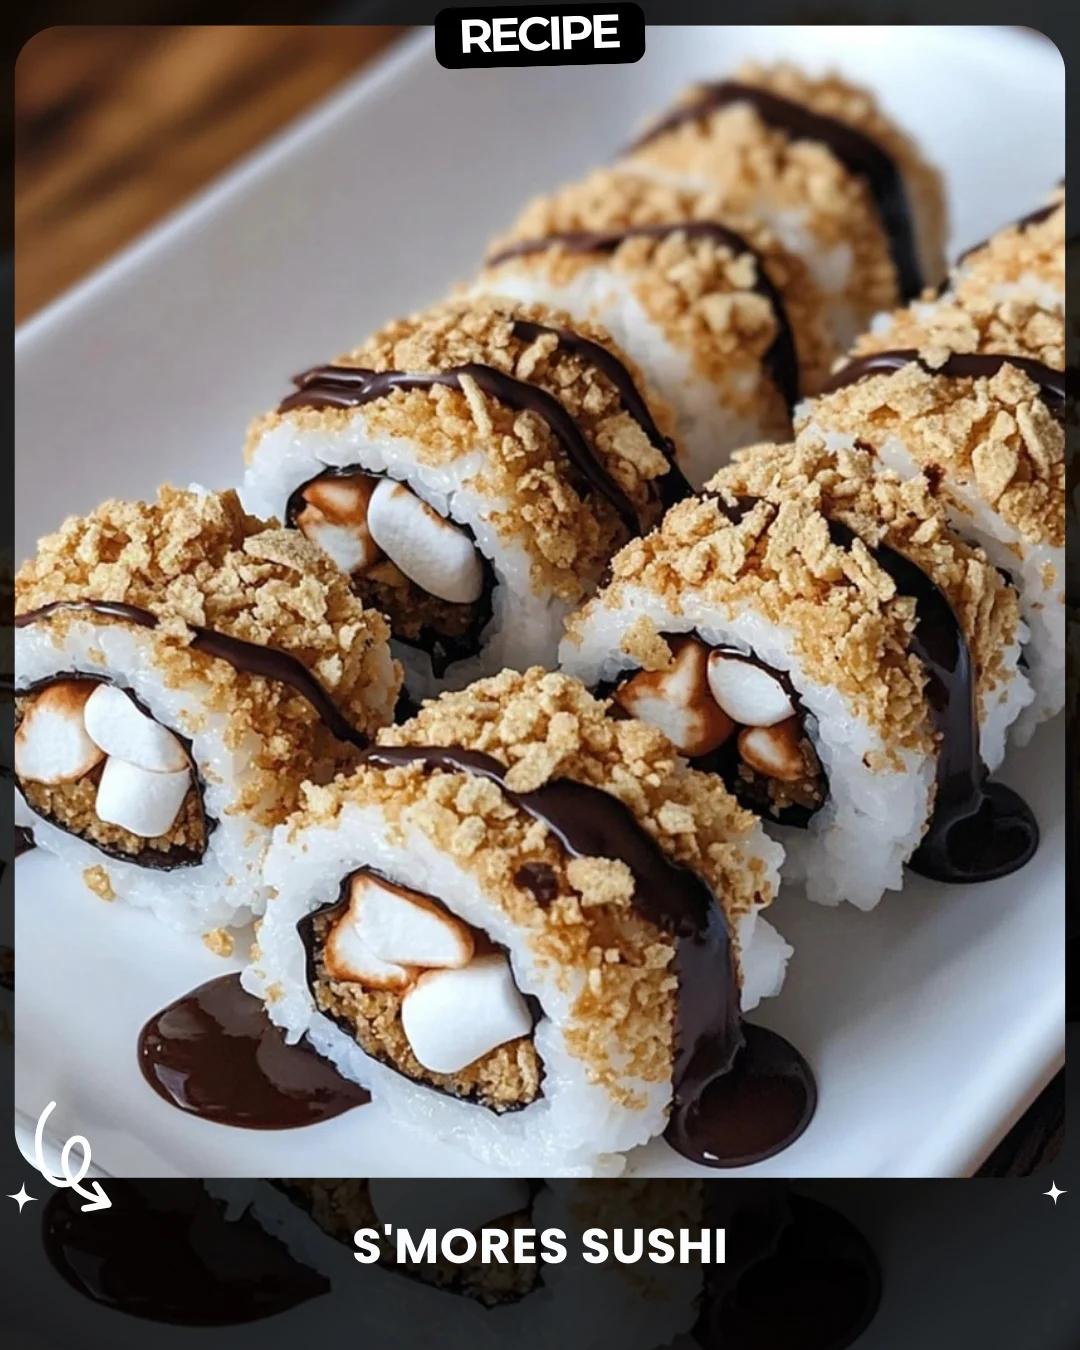
S’mores Sushi
Sweet, crispy, and oh-so-yummy! These s’mores sushi rolls are the ultimate twist on everyone’s favorite campfire treat.
Ingredients:
Butter, mini marshmallows
Cereal, chocolate drizzle, graham crumbs
Steps:
Mix melted marshmallows and cereal.
Shape, top with chocolate and crumbs.
Roll up and slice.
#CelebrationRolls
Step-by-Step Guide
Follow these detailed instructions for perfect S’mores Sushi every time.
- Line a baking sheet with parchment paper. In a large microwave-safe bowl, combine 3 tablespoons of butter with a 10-ounce bag of mini marshmallows. Microwave in 30-second intervals, stirring in between, until completely melted and smooth.
- Immediately pour in 6 cups of crispy rice cereal. Using a spatula, quickly and gently fold until every piece of cereal is thoroughly coated in the marshmallow mixture.
- Turn the mixture out onto the prepared parchment paper. With lightly buttered hands, press and shape it into a roughly 9×12 inch rectangle, about 1/2 inch thick. Ensure the layer is even.
- While the base is still slightly warm, drizzle lines of melted chocolate or chocolate syrup evenly over the entire surface. Then, sprinkle a generous layer of finely crushed graham cracker crumbs over the chocolate.
- Starting from one of the long sides, use the parchment paper to help you tightly roll the rectangle into a log, similar to a sushi roll or jelly roll. Apply gentle, even pressure.
- Allow the roll to set and cool completely, about 1-2 hours. Once firm, use a sharp serrated knife to slice the log into 1-inch thick “sushi” pieces.
Serving Suggestions
Present your S’mores Sushi on a large platter for a stunning dessert table centerpiece. For a fun touch, serve them with chopsticks or decorative cocktail picks. Pair with a scoop of vanilla ice cream for an à la mode treat, or crumble a few extra pieces over yogurt for a decadent breakfast parfait. These rolls are perfect for birthday parties, summer cookouts, or as a creative after-school snack.
How-to Summary
Create S’mores Sushi by melting marshmallows and butter, mixing with cereal, and pressing into a rectangle. Top with chocolate drizzle and graham crumbs, roll tightly into a log, chill until firm, and slice into pieces.
Frequently Asked Questions
Can I make these ahead of time? Yes, you can prepare the rolls up to 2 days in advance. Store the unsliced log, tightly wrapped in plastic wrap, at room temperature. Slice just before serving for the best texture.
My mixture is too sticky to handle. What went wrong? This usually means the marshmallow mixture was too warm. Let it cool for a minute or two after mixing with the cereal, and always use well-buttered hands when pressing and shaping.
Can I use different cereal? Absolutely. While crispy rice cereal is classic, you can experiment with corn flakes, toasted oat cereal, or even crushed pretzels for a sweet-and-salty version.
How do I get clean slices without crushing the roll? Use a sharp serrated knife and a gentle sawing motion. Wiping the knife clean with a damp cloth between cuts also helps achieve perfect, crumb-free slices.
Can I add other ingredients inside the roll? Definitely. Before rolling, try sprinkling mini chocolate chips, chopped nuts, or even a layer of peanut butter over the marshmallow base for extra flavor and texture.
Common Mistakes to Avoid
- Overheating the marshmallows: This can make them tough and chewy. Microwave in short bursts and stop as soon as they are melted.
- Pressing the base too thin: If the rectangle is less than 1/2 inch thick, the roll will be difficult to handle and may crack when slicing.
- Rolling when too cool: If the marshmallow-cereal base cools completely, it will crack when you try to roll it. Roll it up while it’s still slightly warm and pliable.
- Using a dull knife to slice: A dull knife will smash your beautiful roll. A sharp serrated knife is essential for clean cuts.
Conclusion
S’mores Sushi is a brilliantly fun and delicious no-bake dessert that transforms familiar flavors into an unforgettable presentation. By following this step-by-step guide and avoiding common pitfalls, you can easily master this treat. It’s a guaranteed crowd-pleaser that brings the joy of s’mores to any occasion, no campfire required. Enjoy the creative process and the delicious results!