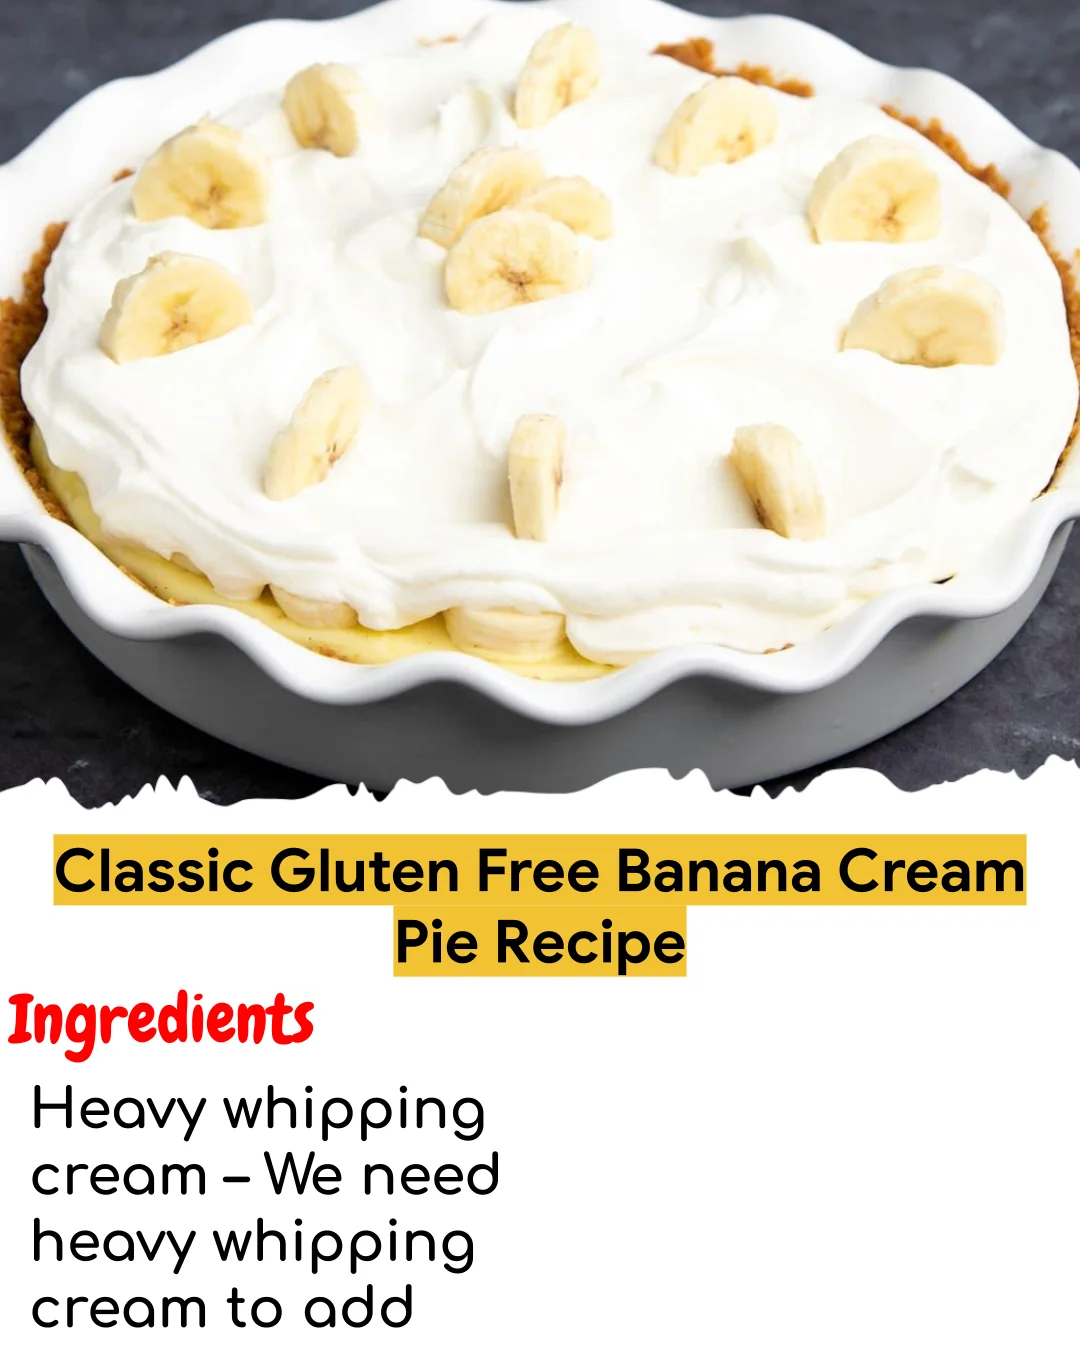
Cooking and Serving: 35 minutes | 8 slices pie
Ingredients
Heavy whipping cream – We need heavy whipping cream to add richness to the | Granulated sugar – The filling only has 1/2 cup of total sugar, and it’s | Cornstarch – The main way we thicken the filling so that it sets enough to
Description
Prep Time: 20 minutes | Cook Time: 15 minutes | Total Time: 35 minutes | Servings: 8 slices pie
Ingredients
Heavy whipping cream – We need heavy whipping cream to add richness to the
Granulated sugar – The filling only has 1/2 cup of total sugar, and it’s
Cornstarch – The main way we thicken the filling so that it sets enough to
Salt – A touch of salt helps balance the sweetness and bring out the vanilla
Milk – The filling calls for whole milk, which has 4% milk fat, since it
Vanilla extract – If you have real vanilla seeds, add them along with some
Butter – Adding a couple tablespoons of unsalted butter to the cooked custard
A blender or food processor for crushing gf graham crackers
A 9-inch pie plate
A saucepan for cooking the filling
Whisk for lots of combining
A fine mesh sieve for straining the custard of any clumps or lumps
A spatula for scraping the custard and the whipped cream, and spreading them
Plastic wrap for covering the filling as it sets
A stand mixer with a whisk attachment or handheld mixer for whipping the
Fine mesh sieve for straining
Heavy-bottom saucepan for cooking the custard
1 9-inch gluten free graham cracker crust
Instructions
FOR THE PIE FILLING
4 (100 g) egg yolks, at room temperature.
¾ cup (6 fluid ounces) heavy whipping cream.
½ cup (100 g) granulated sugar.
5 tablespoons (45 g) cornstarch.
⅛ teaspoon kosher salt.
2 ¼ cups (18 fluid ounces) whole milk.
2 teaspoons pure vanilla extract with vanilla beans, (or just pure vanilla.
2 tablespoons (28 g) unsalted butter.
3 large bananas, (ripe, but not brown-spotty).
STABILIZED WHIPPED CREAM
1 teaspoon (4 g) unflavored powdered gelatin.
1 tablespoon lukewarm water.
1 cup (8 fluid ounces) heavy whipping cream, kept cold, plus more if.
necessary to smooth if it gets curdled looking.
6 tablespoons (43 g) confectioners’ sugar.
1 teaspoon pure vanilla extract.
MAKE THE PIE CRUST
Prepare the baked or no-bake graham cracker crust in a 9-inch pie plate,.
If you’re making a baked crust, let the crust cool completely before.
proceeding with the recipe.
For the no-bake crust, after it’s prepared, place it in the freezer to chill.
while you prepare the filling.
MAKE THE FILLING
Place the egg yolks and heavy cream in a large, heat-safe bowl or measuring.
cup and whisk lightly. Set the mixture aside.
In a medium-size saucepan, place the sugar, cornstarch, salt, and milk, and.
whisk to combine well. Place over medium-low heat and cook, stirring slowly.
but consistently, until just beginning to thicken (about 3 minutes).
Very slowly, drizzle about 1/4 of the hot milk mixture into the egg yolk and.
cream mixture, whisking constantly. This is to increase the temperature of.
the egg yolk mixture very slowly, so the yolks don’t scramble (it’s called.
tempering the egg yolks).
Pour the warm egg yolk mixture back into the saucepan with the remaining hot.
Return the saucepan to medium-low heat and cook, stirring constantly and.
slowly, for about 3 minutes more, or until the pudding is thickened to the.
point where the whisk leaves a very visible trail in the mixture that pauses.
before it runs back together, and the mixture coats the back of a spoon.
Place a fine mesh sieve over a large measuring cup or medium-size heat-safe.
Remove the pan from the heat, and pour the mixture through the sieve into the.
bowl, to remove any solid pieces. Add the butter and vanilla to the strained.
filling, and whisk to melt the butter and combine well.
Allow the filling mixture to sit at room temperature, whisking frequently,.
until no longer hot to the touch.
Pour the filling into the prepared pie crust and smooth it into an even layer.
with a spatula. Place plastic wrap directly on top of the pie filling and.
refrigerate for at least 3 hours or until set.
Refrain from finishing the pie until you’re nearly ready to serve it, since.
the sliced bananas will brown quickly.
TO ASSEMBLE THE FINISHED PIE, FIRST PREPARE THE STABILIZED WHIPPED CREAM.
In a very small bowl, mix the gelatin and water together, and allow the.
mixture it to sit until the gelatin swells.
Microwave on low until the gelatin is just melted, and allow the mixture to.
In the bowl of a stand mixer fitted with the whisk attachment or in a large,.
cold bowl with a handheld mixer, place the cold 1 cup heavy whipping cream.
Whip cold heavy whipping cream until it begins to thicken slightly.
With the mixer on low speed, drizzle in the melted gelatin to the cream. Whip.
to combine. Continue to whip until the whipped cream reaches soft peaks.
Add the confectioners’ sugar and vanilla to the whipping cream, and continue.
to whip until smooth and holds stiff but not dry peaks.
Drizzle in more cold cream slowly as the mixer beats if it’s necessary to.
smooth the whipped cream.
Set the cream aside briefly. You don’t need to refrigerate it.
FINISH ASSEMBLING THE PIE RIGHT BEFORE SERVING IT.
Before serving, peel and slice the bananas, one at a time, into disks. Place the sliced bananas in concentric circles on top of the.
custard filling, pressing gently to help them adhere to the custard filling.
Spread or pipe the whipped cream over the top of the pie and spread it into.
an even layer. Add more sliced bananas, slice, and serve as soon as possible.
The whipped cream will stay fresh at room temperature for hours without.
weeping, but the bananas will brown.
Notes
* Equipment you’ll need to make a gluten free banana cream pie
* Making a gluten free graham cracker crust
* Tips for perfecting this gluten free banana cream pie recipe
* How to store a gf banana cream pie
* Gluten free banana cream pie: substitutions
* Gluten Free Banana Cream Pie Recipe
WHAT MAKES THIS GLUTEN FREE BANANA CREAM RECIPE PIE SPECIAL
This gluten free banana cream pie is really all about the filling. Smooth,
creamy, and packed with vanilla flavor, it’s unique among banana cream pies
because you can slice it really cleanly, even when it’s been sitting out for a
If you’ve done some googling of banana cream pies, you’ll notice that most of
them wouldn’t dare post an image of a slice of pie. I suspect it’s because most
of them don’t set up properly. But if you scroll to the bottom of this post,
you’ll see a beautiful slice. Proof!
You can make it with a baked graham cracker crust (which is a little bit more
stable and less crunchy), a no-bake crust (more crumbly, tastes a little more
buttery), or even no crust at all. The rich vanilla cooked custard filling sets
up so perfectly that you can even have it without any crust at all.
* Bananas – We want ripe bananas, but not the kind that are super spotty and
soft. That’s the type we mash for making gf banana bread
we want here are ripe enough to be flavorful and soft, but still hold their
shape when sliced in cross-section.
* Egg yolks – We use egg yolks to make the custard pie filling creamy and rich,
and also to help thicken it. They should be at room temperature, since we are
going to warm them up a bit before cooking them with the rest of the filling
ingredients, and we don’t want them to clump.
* Heavy whipping cream – We need heavy whipping cream to add richness to the
custard filling, and then to whip into whipped cream for the top of the
filling and bananas. Be sure to whip the cream for the topping until it’s
pillow soft and holds a peak, but if you find that you’ve whipped it too
much, and it seems to curdle, just whip in more cream until it smooths out.
* Granulated sugar – The filling only has 1/2 cup of total sugar, and it’s
plenty sweet since there is a bit of confectioners’ sugar in the topping, and
the ripe bananas are sweet.
* Cornstarch – The main way we thicken the filling so that it sets enough to
slice cleanly is cornstarch it fully.
* Salt – A touch of salt helps balance the sweetness and bring out the vanilla
* Milk – The filling calls for whole milk, which has 4% milk fat, since it
provides exactly the right richness and smooth mouth feel when combined with
heavy whipping cream in the filling.
* Vanilla extract – If you have real vanilla seeds, add them along with some
pure vanilla extract to the filling and the filling will taste more robust,
and have those beautiful vanilla flecks. You can also use an equal amount of
vanilla bean paste to the filling and even to the stabilized whipped cream.
* Butter – Adding a couple tablespoons of unsalted butter to the cooked custard
filling helps add richness without adding more egg yolks, and that creamy,
Side image of white fluted pie plate with whipped cream layer and bananas on top
image of white fluted pie plate with whipped cream layer and bananas on top
EQUIPMENT YOU’LL NEED TO MAKE A GLUTEN FREE BANANA CREAM PIE
To make a banana cream pie with a stabilized whipped cream topping, you’ll
mostly need a lot of heat-safe mixing bowls in a lot of different sizes. In
addition, you’ll need:
* A blender or food processor for crushing gf graham crackers
into crumbs for the pie crust
* A saucepan for cooking the filling
* Whisk for lots of combining
* A fine mesh sieve for straining the custard of any clumps or lumps
* A spatula for scraping the custard and the whipped cream, and spreading them
* Plastic wrap for covering the filling as it sets
* A stand mixer with a whisk attachment or handheld mixer for whipping the
MAKING A GLUTEN FREE GRAHAM CRACKER CRUST
Please click through to learn how to make a super easy gf graham cracker crust
combining gf graham cracker crumbs (or really any crunchy gf cookie) with melted
butter, and pressing the crumbs into the bottom and halfway up the sides of a
standard 9-inch pie plate.
You can make a slightly more complicated version of a graham cracker crust that
you bake until stable in the oven, too. If you do, you’ll find it easier to
slice the pie and get that first slice to come out perfect since the crust holds
Yellow custard in round pan with white spatula dragging through it
custard in round pan with white spatula dragging through it
TIPS FOR PERFECTING THIS GLUTEN FREE BANANA CREAM PIE RECIPE
HOW TO MAKE SURE YOUR GF BANANA CREAM PIE SETS
To ensure that your filling sets up perfectly and slices cleanly, you need
exactly the ratio of filling ingredients I’ve specified in the pie filling
recipe below—and to cook it long enough. It’s very common to undercook the
filling, since it will appear thickened, but is still undercooked until it
passes the right “doneness test.”
The doneness test for a fully set custard filling is that it must not just coat
the back of your mixing spoon or spatula very thickly, but the whisk or spatula
you’re using to mix leaves a very visible trail in the mixture that pauses
before it runs back together in the pan. If your pan is relatively small (with
higher sides), you will need to tilt it to the side before you do this test
since the bottom of the pan must be visible when you drag the implement through
The best way to help you visualize this doneness test is to watch the video, if
that’s possible. The photos just above this text also demonstrates the test.
SAVE YOUR SLICED BANANA TOPPING FOR SERVING
It’s tempting to make a more banana-heavy banana cream pie custard into two parts in the pie plate and layering bananas between the parts.
But if you do that, center will have begun to turn brown and weep, making the filling a bit sad.
Instead, make wait until you’re nearly ready to serve your banana cream pie
before adding sliced bananas, layering them on top of the set custard, and on
top of the whipped cream you layer on top of that. If you think you might not
serve the whole pie, you can even just top half of it, or top each slice
individually before serving.
Plastic wrap on top of yellow custard in white pie plate
wrap on top of yellow custard in white pie plate
HOW TO STORE A GF BANANA CREAM PIE
CAN YOU MAKE A GLUTEN FREE BANANA CREAM PIE IN ADVANCE?
Yes! And, well, no. You can make the crust and add the cooked filling up to 4
days ahead of time, and store the pie with plastic wrap right on top of the
filling that whole time. Once you add the banana slices, time is ticking!
They’ll get brown and release liquid within an hour or so.
GLUTEN FREE BANANA CREAM PIE: SUBSTITUTIONS
GLUTEN FREE, DAIRY FREE BANANA CREAM PIE
To make this pie dairy free as well as gluten free, you’ll need to replace the
cream, milk, and butter with dairy free alternatives. For the cream, you can try
the cream from a can of coconut milk (keep it cold and it can be made into
coconut whipped cream, too). For the whole milk, try full fat coconut milk (not
the cream, which is solid at room temperature), but not a very watery nondairy
milk like almond milk or your custard won’t thicken properly.
In place of the butter in the filling and in the graham cracker crust, try using
vegan butter (Miyoko’s Kitchen and Melt are great brands).
CAN YOU MAKE EGG FREE, GLUTEN FREE BANANA CREAM PIE?
To make this into an egg-free gf banana cream pie, you would need to make an
egg-free custard-style filling. You can try using the filling from our no bake
cheesecake with gelatin here, and layer it with bananas and whipped cream.
There is no substitute for egg yolks that would allow you to make this pie
otherwise as is, though.
CAN YOU MAKE THIS GLUTEN FREE BANANA CREAM PIE WITHOUT BANANAS?
Yes! Believe it or not, this pie would be delicious with nearly any other
sliced, tender fruit in place of bananas (sliced strawberries would be truly
delicious). You can also just make it entirely without bananas and without
another fruit as a vanilla custard pie. It tastes amazing all on its own!
CAN I MAKE THIS BANANA CREAM PIE FILLING WITHOUT CORNSTARCH?
Cornstarch is perfect for this recipe when you’re not making other ingredient
substitutions and you cook the filling properly. If you can’t have cornstarch,
you can try replacing it with arrowroot or even superfine glutinous rice flour,
but it may not set up quite as well.
Banana slices in whipping cream on top of more bananas and yellow custard in
slices in whipping cream on top of more bananas and yellow custard in white pie
Is banana cream pie gluten free?
Banana cream pie filling is sometimes gluten free, if it’s made with only gluten
free thickeners like cornstarch. However, the crust will almost always have
gluten in it. This banana cream pie is made with only designated gluten free
ingredients, so it’s safely gluten free.
Is Jello banana pudding gluten free?
Jell-O brand “Cook & Serve Banana Cream Pudding & Pie Filling” is considered
“gluten safe,” since it’s made labeling, where they will disclose if any ingredient contains an allergen,
including wheat or gluten. It is not labeled specifically gluten free, but I
would serve it to my gluten free son.
How do you ripen unripe bananas for this pie?
If your bananas are not ripe enough to make this gf banana cream pie, there are
some ideas for how to speed their ripening process but for the most part time is
the only additional ingredient that will ready your bananas for this pie.
Instead of trying to bake your bananas to soften them (that will soften them too
much, and they’ll be soft but still taste rather unripe), I recommend making and
assembling the pie crust and filling, and letting it sit in the refrigerator for
a few days while your bananas ripen properly. And remember: you want them ripe,
How do you thicken gluten free banana cream pie?
The filling in this banana cream pie is thickened with egg yolks and cornstarch,
cooked slowly and carefully until the custard is “done.”
Can I use a store-bought gf graham cracker crust?
Yes! You can use any store bought gf pie crust for this gf banana cream pie
recipe. Mi-Del brand sells one that isn’t great, but it’s good enough!
Can I make this pie as individual servings?
Sure! Try pressing the no bake graham cracker crust mixture in small portions
into the greased wells of a muffin tin. Then, fill the cups with the cooked, and
cooled custard that you covered and let set in the refrigerator. Just top with
bananas and whipped cream before serving.
How do you keep the pie crust from getting soggy?
The only way your pie crust will get soggy is if your custard isn’t set properly
and it leaks liquid. And don’t add sliced bananas too early, or they’ll begin to
weep, and may soak the crust as well.
Why is my gf banana cream pie runny?
If your pie is runny, your filling is probably undercooked. Be sure to measure
your ingredients it passes the “doneness test” we talked about above.
Can you freeze banana cream pie?
No, this pie cannot be frozen since the custard does not freeze well—and neither
Slice of pie with brown graham cracker crust, yellow custard, whipped cream and
bananas on small white plate with fork
of pie with brown graham cracker crust, yellow custard, whipped cream and
bananas on small white plate with fork
Go Ad-Free
GLUTEN FREE BANANA CREAM PIE
Prep Time: 20 minutes mins
Cook Time: 15 minutes mins
Chilling time: 3 hours hrs 30 minutes mins
whole gluten free banana cream pie with banana slices on top of cream topping
gluten free banana cream pie with banana slices on top of cream topping
Make a gluten free banana cream pie from scratch with this easy recipe. Learn
how to make a simple gf banana cream pie filling and choose from two crusts.
* Fine mesh sieve for straining
* Stand mixer with whisk attachment or handheld mixer
* Heavy-bottom saucepan for cooking the custard
* 1 9-inch gluten free graham cracker crust
please click link for instructions on making homemade crust
* 4 (100 g) egg yolks, at room temperature
* ¾ cup (6 fluid ounces) heavy whipping cream
* ½ cup (100 g) granulated sugar
* 5 tablespoons (45 g) cornstarch
* ⅛ teaspoon kosher salt
* 2 ¼ cups (18 fluid ounces) whole milk
* 2 teaspoons pure vanilla extract with vanilla beans, (or just pure vanilla
* 2 tablespoons (28 g) unsalted butter
* 3 large bananas, (ripe, but not brown-spotty)
STABILIZED WHIPPED CREAM
* 1 teaspoon (4 g) unflavored powdered gelatin
* 1 tablespoon lukewarm water
* 1 cup (8 fluid ounces) heavy whipping cream, kept cold, plus more if
necessary to smooth if it gets curdled looking
* 6 tablespoons (43 g) confectioners’ sugar
* 1 teaspoon pure vanilla extract
* Prepare the baked or no-bake graham cracker crust in a 9-inch pie plate,
according to the recipe instructions.
* If you’re making a baked crust, let the crust cool completely before
proceeding with the recipe.
* For the no-bake crust, after it’s prepared, place it in the freezer to chill
while you prepare the filling.
* Place the egg yolks and heavy cream in a large, heat-safe bowl or measuring
cup and whisk lightly. Set the mixture aside.
* In a medium-size saucepan, place the sugar, cornstarch, salt, and milk, and
whisk to combine well. Place over medium-low heat and cook, stirring slowly
but consistently, until just beginning to thicken (about 3 minutes).
* Very slowly, drizzle about 1/4 of the hot milk mixture into the egg yolk and
cream mixture, whisking constantly. This is to increase the temperature of
the egg yolk mixture very slowly, so the yolks don’t scramble (it’s called
tempering the egg yolks).
* Pour the warm egg yolk mixture back into the saucepan with the remaining hot
* Return the saucepan to medium-low heat and cook, stirring constantly and
slowly, for about 3 minutes more, or until the pudding is thickened to the
point where the whisk leaves a very visible trail in the mixture that pauses
before it runs back together, and the mixture coats the back of a spoon
* Place a fine mesh sieve over a large measuring cup or medium-size heat-safe
* Remove the pan from the heat, and pour the mixture through the sieve into the
bowl, to remove any solid pieces. Add the butter and vanilla to the strained
filling, and whisk to melt the butter and combine well.
* Allow the filling mixture to sit at room temperature, whisking frequently,
until no longer hot to the touch.
* Pour the filling into the prepared pie crust and smooth it into an even layer
with a spatula. Place plastic wrap directly on top of the pie filling and
refrigerate for at least 3 hours or until set.
* Refrain from finishing the pie until you’re nearly ready to serve it, since
the sliced bananas will brown quickly.
TO ASSEMBLE THE FINISHED PIE, FIRST PREPARE THE STABILIZED WHIPPED CREAM.
* In a very small bowl, mix the gelatin and water together, and allow the
mixture it to sit until the gelatin swells.
* Microwave on low until the gelatin is just melted, and allow the mixture to
* In the bowl of a stand mixer fitted with the whisk attachment or in a large,
cold bowl with a handheld mixer, place the cold 1 cup heavy whipping cream.
Whip cold heavy whipping cream until it begins to thicken slightly.
* With the mixer on low speed, drizzle in the melted gelatin to the cream. Whip
to combine. Continue to whip until the whipped cream reaches soft peaks.
* Add the confectioners’ sugar and vanilla to the whipping cream, and continue
to whip until smooth and holds stiff but not dry peaks.
* Drizzle in more cold cream slowly as the mixer beats if it’s necessary to
smooth the whipped cream.
* Set the cream aside briefly. You don’t need to refrigerate it.
FINISH ASSEMBLING THE PIE RIGHT BEFORE SERVING IT.
* Before serving, peel and slice the bananas, one at a time, into disks. Place the sliced bananas in concentric circles on top of the
custard filling, pressing gently to help them adhere to the custard filling.
* Spread or pipe the whipped cream over the top of the pie and spread it into
an even layer. Add more sliced bananas, slice, and serve as soon as possible.
* The whipped cream will stay fresh at room temperature for hours without
weeping, but the bananas will brown.
Nutrition information is automatically calculated, so should only be used as an